Rollin' Rollin' Rollin'
Or the deceptively simple technique for hand sewing a rolled hem on just about anything.
This technique has eluded me for nearly 2 years. I had tried everything I could think of to no avail. As it turns out, no ONE technique could fully do the trick. No wonder my rolled hems always seemed half done. They were!
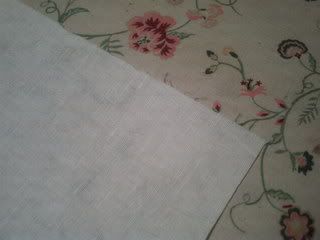
1. Cut a nice straight square of fabric with no loose strings. Linen works best for your first project because it will easily hold the roll as you work.
2. Place fabric with the wrong side facing you.
3. Spit on your thumb and index finger. Hey, nobody said sewing was sanitary.
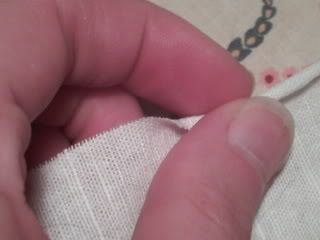
4. Place your fingers under the fabric, with your thumb on top. Use your thumb to gently pull edge towards you into a narrow roll. This is where that little bit of spit comes in handy. The moisture helps the fabric "take" to the roll. If you're lucky the material will hold the roll for it's full length. If not, simply do the thumb roll as you go.
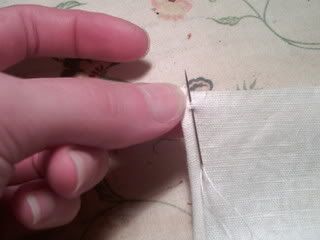
5. Take a straight stitch into the body of the fabric, going towards the outside edge. This helps secure the thread & makes rolling at the edge easier.
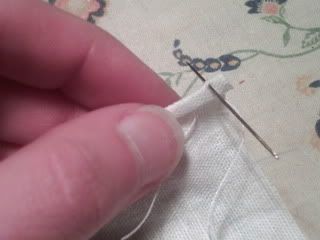
6. Next, take a stitch *through* the roll from step 4, going towards the right side of the fabric.
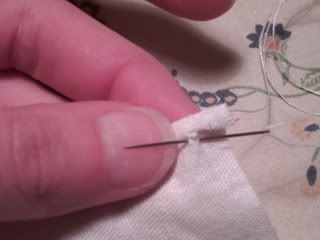
7. Bring your working thread over the roll as you take a straight stitch into the body of the fabric again, this time going towards the far end of the piece.
8. Repeat stitching through the roll & body fabric for 2-3 stitches.
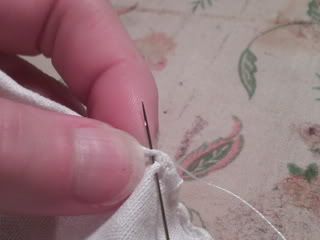
8a. Alternately, you can take both roll & body stitches at once, always ending with a stitch through the body fabric.
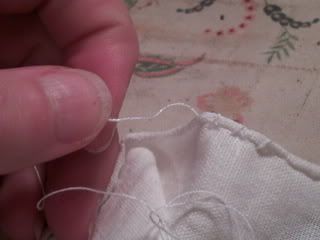
9. Gently pull the working thread towards the far end of the piece, holding the near end with your other hand. Do not however, pull to much or you will pucker the resulting hem.
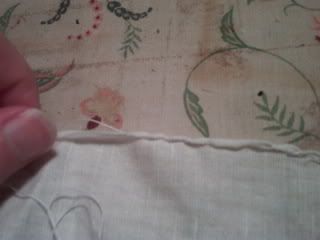
10. Marvel as the hem rolls into itself!
11. Repeat for the full length of your project.
11a. To turn a corner, simply tie off & start the next side in the same way you started the first side. The very end of the first side will get rolled into the second side but that's OK. This gives your corners a neat finish.
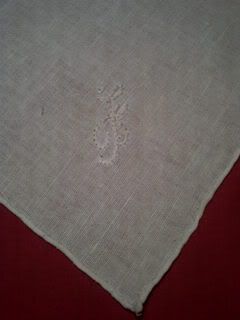
12. Find all kinds of places to use a hand rolled hem. This happens to be a nice little handkerchief to keep in my pocket. Very useful for blowing your nose after taking snuff from Sanctuary Traders.
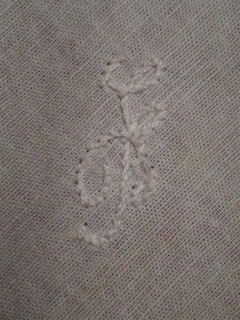
13. Embroider your monogram onto the wrong side of the handkerchief because it was 2AM ad you weren't paying attention.
14. Oh well, make another using your newly mastered hand sewn rolled hem stitching!
This technique has eluded me for nearly 2 years. I had tried everything I could think of to no avail. As it turns out, no ONE technique could fully do the trick. No wonder my rolled hems always seemed half done. They were!

1. Cut a nice straight square of fabric with no loose strings. Linen works best for your first project because it will easily hold the roll as you work.
2. Place fabric with the wrong side facing you.
3. Spit on your thumb and index finger. Hey, nobody said sewing was sanitary.

4. Place your fingers under the fabric, with your thumb on top. Use your thumb to gently pull edge towards you into a narrow roll. This is where that little bit of spit comes in handy. The moisture helps the fabric "take" to the roll. If you're lucky the material will hold the roll for it's full length. If not, simply do the thumb roll as you go.

5. Take a straight stitch into the body of the fabric, going towards the outside edge. This helps secure the thread & makes rolling at the edge easier.

6. Next, take a stitch *through* the roll from step 4, going towards the right side of the fabric.

7. Bring your working thread over the roll as you take a straight stitch into the body of the fabric again, this time going towards the far end of the piece.
8. Repeat stitching through the roll & body fabric for 2-3 stitches.

8a. Alternately, you can take both roll & body stitches at once, always ending with a stitch through the body fabric.

9. Gently pull the working thread towards the far end of the piece, holding the near end with your other hand. Do not however, pull to much or you will pucker the resulting hem.

10. Marvel as the hem rolls into itself!
11. Repeat for the full length of your project.
11a. To turn a corner, simply tie off & start the next side in the same way you started the first side. The very end of the first side will get rolled into the second side but that's OK. This gives your corners a neat finish.

12. Find all kinds of places to use a hand rolled hem. This happens to be a nice little handkerchief to keep in my pocket. Very useful for blowing your nose after taking snuff from Sanctuary Traders.

13. Embroider your monogram onto the wrong side of the handkerchief because it was 2AM ad you weren't paying attention.
14. Oh well, make another using your newly mastered hand sewn rolled hem stitching!
Labels: Accessories, Tutorials

2 Comments:
Cooool...have to try that out. :p
Chloe,
I am enamoured with your site! You have raised the barr!!! I hope to see you next year in «camp».
Post a Comment
<< Home