Day 3: Polonaise
Day three wasn't a highly productive day in the four day polonaise project.
The sleeve outers had already been mocked up and roughly set into the arm scye. All that had to be done was sew them in place for the long term. To do this I followed the same technique I had learned while doing the sleeves on the Hunting Frock/Riding Habit.
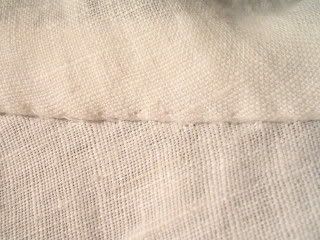
First, I caught the outer & lining along the bodice side of the arm scye while setting in the sleeve. Next I attached the sleeve liner to the cuff edge of the sleeve. The lining is pulled up and whip stitched over the bodice to sleeve seam, leaving a nice, covered interior.

Just like at the neckline, I folded the wool outer over the linen liner at the sleeve cuffs and whip stitched the outer in place. I prefer this finish and like that it provides a nice stable spot to baste later sleeve ruffles without wearing on the lighter linen lining.
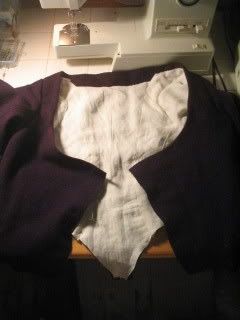
The semi finished bodice. The only unfinished seams are along the bottom edge where the skirt will be attached and along the front center. I'm saving the front center seam for last so that it's as neat & tidy as possible.

After the sleeves where set in & the lining completed I still had some sewing energy, so I got a head start on the skirts. I sewed the two skirt panels together along the back center and roughly pleated the skirt in place. I left plentiful amounts of fabric at the front opening, both for the facing and because the wool didn't pleat as tightly as a lighter fabric would have. Frankly there was just more in the skirt piece than was needed. Still not enough to have made a round gown out of the scraps though.
The sleeve outers had already been mocked up and roughly set into the arm scye. All that had to be done was sew them in place for the long term. To do this I followed the same technique I had learned while doing the sleeves on the Hunting Frock/Riding Habit.
First, I caught the outer & lining along the bodice side of the arm scye while setting in the sleeve. Next I attached the sleeve liner to the cuff edge of the sleeve. The lining is pulled up and whip stitched over the bodice to sleeve seam, leaving a nice, covered interior.

Just like at the neckline, I folded the wool outer over the linen liner at the sleeve cuffs and whip stitched the outer in place. I prefer this finish and like that it provides a nice stable spot to baste later sleeve ruffles without wearing on the lighter linen lining.
The semi finished bodice. The only unfinished seams are along the bottom edge where the skirt will be attached and along the front center. I'm saving the front center seam for last so that it's as neat & tidy as possible.

After the sleeves where set in & the lining completed I still had some sewing energy, so I got a head start on the skirts. I sewed the two skirt panels together along the back center and roughly pleated the skirt in place. I left plentiful amounts of fabric at the front opening, both for the facing and because the wool didn't pleat as tightly as a lighter fabric would have. Frankly there was just more in the skirt piece than was needed. Still not enough to have made a round gown out of the scraps though.
Labels: 18th Century, Tutorials, Women

0 Comments:
Post a Comment
<< Home