Slightly Obsessed

A long standing living history blog covering all eras with a special focus on clothing, food & social culture as well as first-person reenacting.

Name:
Location: Barrington, 2c79a7d7-8d84-e411-95ca-d4ae52b58f15, United States

Thursday, April 16, 2015

Govern Well Thy Appetite, Part 1.

Or historic food and the modern diet.

For some people experimenting with historic recipes, exploring unique ingredients and testing batches of odd looking results is the fun part of living history. For others, especially those who follow restricted diets, it's hard enough to find something to eat in the modern world, much less a historic recipe. However, it's not actually as hard as it might seem at first to eat period correct foods while still sticking with your dietary needs.

For this mini-series of articles, I'm going to look at a few of the most common dietary restrictions, how to cope with them without sacrificing historical accuracy (too much) and a few favorite recipes that fit the bill. Every one of the recipes I suggest here has been tested, often times at an event, and is guaranteed to appease both those with special diets & the omnivores alike.

Vegetarian


Vegetarianism is pretty common in the 21st century but it isn't a new concept. Sure it might seem as though every meal & every dish contained some kind of meat. Some recipes seem like the cook was just trying to cram as many meats into one dish as possible. Thankfully, that's not really true. During the late 18th & early 19th century many enlightenment leaders adopted vegetarianism as part of their greater lifestyle. Writers such as Francois-marie Arouet (aka Voltaire), Percy Shelley & even Leo Tolstoy were all vegetarians. Additionally, many of the lower classes relied heavily on vegetables to fill out the meat supplies they simply couldn't afford.

Lettuce, Tacuinum Sanitatis, 1400.

One of my favorite historic vegetarian dishes to make is cooked greens. Alternately called buttered worts in the 16th century, sallat in the 17th century or simply greens, these are nothing more than spinach, collards, mustard greens, cabbage and any other leafy vegetable. Greens are some of the first vegetables available during the growing season & some of the last before the frost hits. They are ideal for year round events, fast to prepare & adaptable for a variety of time periods. The most basic preparation is simply cooking until soft & dressing with butter or oil, but other ingredients & spices are sometimes included depending on the tastes of the era & the whims of the cook.

Salad dish, c.1800-1810. Victoria & Albert Museum and Salad Bowl, 1728. The Met.
Sallets in general consist of certain Esculent Plants and Herbs, improv'd by Culture, Industry, and Art of the Gard'ner: Or as others say, they are a Composition of Edule Plants and Roots of several kinds, to be eaten Raw or Green, Blanch'd or Candied; simple, and per se, or intermingl'd with others according to the Season.

Acetaria: a discourse of sallets
John Evelyn, 1699

Lettuce Seller, Philippe de Tubieres. 1742. The Met 
A Boyled Sallet.
Take Spinage and boyle it and chop it, and when it is chopt, poure it in a little Pipkin, with Corance, sweete Butter, Vinagre, and Sugar, boyle them altogither, and when they are boyled put it in a dishe, and lay sippets round about, and strew suger upon them and serve them out.

Book of Cookery
A.W. 1591

Spinach
Be careful to pick it exceeding clean, then wash it in five or six waters. Put it into a saucepan that will just hold it without water. Throw a little salt over it and cover it close. Put your saucepan on a clear quick fire and when you find the spinach shrunk and fallen to the bottom and the liquor that comes out boils up, it is done Then put it into a clean sieve to drain and just give it a gentle squeeze. Lay it on a plate and send it to table with melted butter in a boat.

The Housekeeper's Instructor, Or, Universal Family Cook
William Augustus Henderson, 1805


Part 2: Dairy-Free & Vegan (Coming Soon)

Labels: , , , ,

Saturday, July 19, 2014

Life is a foreign language: all men mispronounce it

or Easy foreign language for first person interpreters.

The contrast : a French prisoner in England ; an English prisoner in France. 
1758. Lewis Walpole Library Digital Collection

As anyone who has been reading this blog, or visiting with me at events over the past several years knows, I am a huge proponent of first person interpretation. During the course of my time presenting & interacting not only with the public but with other reenactors in this manner I have run across several popular excuses that folks like to use for why they don’t join me in the fun of first person interpretation.

Today I’d like to debunk one of those excuses and hopefully offer some alternatives for those struggling with first person interpretation or who are interested in getting started.

Using Foreign Language!

First off, it’s great that I need to talk about this subject. Why? Because it means that we aren’t just portraying the average American or Englishman, but that people are interested in portraying the wide variety of nationalities that populate the historic world. This in itself is a fantastic thing! But portraying someone of a non-English speaking nationality is not without its difficulties. The biggest of these, especially for anyone doing first person, is how to deal with a foreign language.

So what options do you have if your heart is set on portraying a non-English speaking person, but you don't speak a lick of the language? That really depends on how determined you are, both in your first person & your dedication to language learning. Are you planning on making this persona your primary focus or is it just a whim to try at the rare event? Are you obsessed like I am, or more of a first person dabbler? Either way, using foreign language properly adds to both first person portrayals & to events as a whole.

The “Sprinkle” Technique of Foreign Language First Person

How can you quickly give the impression of being a non-English speaker in first person, without spending years learning another language? Key words & phrases of course! A friend coined this the “sprinkle technique” because we are using a few key words, sprinkled in with mostly English. It's just enough of the target language to remind the public that you are portraying a foreign speaker but not so much that anyone who doesn't speak the language is confused. It's like in Star Trek shows, where we know the characters speak different languages, but we suspend our disbelief just long enough & accept everyone speaking English besides a few choice terms in their native language (Qapla anyone?).

What are key words & phrases? They are those simple words usually found at the beginning of language books & audio tapes. They are the first for a few obvious reasons; they are easy to learn & they are the words you need to know now when talking to a native speaker. They are the things you say to the lady behind the counter at the coffeehouse in Paris, to the guy getting off the train in Prague or the kids running down the hall in Munich. Those words that everyone from toddlers to seniors know & use.

Now think about how the public at a historic event will react to those same, simple, but essential words when presented in the right context. A member of the public walks into the kitchen at a 16th century event & is greeted by the woman chopping garlic with a cheerful “hola”, or overhears 2 interpreters chatting in English yet when they part one yells “bis spater” & the other “tschuss”. Does that member of the public know exactly what was said? Maybe, maybe not. What they do know is that those first person interpreters, while they might have been speaking in English for the majority of the time, are not portraying English speakers.

Key Words to Learn & When to Use Them

General greetings & goodbyes. If you are going to learn absolutely nothing else, at least learn how to say hello & good bye in your persona's native language. Obviously these words are best used when the public enters or exits a room, or when another first person interpreter joins you. Beyond having an obvious use, the fact that hello & goodbye are used at the beginning & end of interactions is also important. By starting with a single word in your persona's language, you are telling the public a vital piece of information: you are portraying a non-English speaker. Imagine that, one word & they know something about you! Doesn't matter if that is the only dang word you know in your target language & it took 6 months to learn to say it properly! The same goes for saying goodbye. By closing in your persona's language you are giving them a solid reminder of who they were interacting with, a reminder that will stick with them long after the door closes.

France Freedom Britain Slavery. James Gillray. 1789. National Portrait Gallery.
Yes, no, I don't know. In addition to greeting others in your persona's language, being able to easily answer simple questions should be high on the list of words to learn. The simplicity of “yes, no, I don't know” is two fold. First, each has it's own pantomime. No matter what language the public or interpreters speak, everyone understands a vigorous head shake, a big smile & a nod or a shrug of the shoulders. Add in the rudimentary “ya” and you've conveyed not only that you are a non-English speaker, but that you agree with what has been said.

Why is “I don't know” included in this list? Because as living historians there are always going to be times when we simply don't know the answer. Saying it while maintaining the language makes it easier to stay in first person rather than slipping. Plus it's useful for those rare times you happen to run into an actual native speaker & need a quick out if they start speaking a mile a minute in a language you only know 5 words in. Believe me, it will happen & you will be thankful for that little out and a good laugh with the person who really thought you understood them.

Trade Terminology. So you've got the bare essentials down but would still like to add more to your first person foreign language vocabulary without going over board. There are a lot of words out there to choose from, where do you start? With things that your persona would actually have reason to say of course! Will a gunsmith ever need to explain turnip stew to the public, probably not, but a cook might. Knowing what that recipes would have been called in your persona's native language, using it when the public asks what is in the pot & then explaining to them (in English) that it is a turnip stew while showing them the roots demonstrates that your persona is a non-English speaker, but doesn't neglect the public's desire to learn & have their questions answered.

The inability to share information with the public while in first person, especially when that first person is a non-English speaker, is a common concern that is eliminated with the sprinkle technique. We often have to explain unfamiliar English words to the public when discussing historic objects, those terms being in a foreign language is no different. In a way the trade specific terminology itself becomes the springboard to educating the public rather than limiting their experience. Plus, given a “funny” name, even turnip stew can be entertaining.

How to Learn Key Words & Phrases (for Free!)

Thanks to the internet you can learn just about every language your heart could desire, for free. All you have to do is know where to look. Since we are only interested in a very simple words & phrases, most of the learning programs that focus on reading, writing & complex grammar are useless. Instead focusing on auditory based programs can make learning the necessary pronunciation fast and easy. Following are my favorite places for learning a variety of languages. In addition, free audio CDs from your local library can be a fantastic, free way to learn a language. Plus they are especially helpful for long car rides, say to far away events where you intend to use said language.

The Contrast. Thomas Rowlandson (printer). 1792. Lewis Walpole Library Online

Omniglot.  A huge, wandering, language loving website that has a section for “Useful Foreign Phrases”. Provides plenty of auditory files in enough languages that even the most obscure reenactor can find one to suit their needs. Great for learning just a few phrases but not much help in how to combine them into a full sentence or more.

Duolingo. My personal favorite for language learning. Very game-like with speech recognition on the phone app, lots of audio, visual & builds gradually over multiple lessons. The main drawback is that you have to actually learn the entire language, not just a few key phrases, so this might not be the best choice if minimalism is your goal.

As you can see, while the idea can be frightening at first, by using the sprinkle technique it is possible to portray a non-english speaking historical persona without also sacrificing your ability to educate the public. Hopefully I will get a chance to see some of you trying out this technique at a historic event in the near future. Until then adios, auf wiedersehen, do widzenia or how ever you choose to say it!

Labels: , , , ,

Monday, April 21, 2014

And the Water Was Spent in The Bottle

Or a quick recipt for orange shrub as served at the C. Black Coffeehouse, most suitable for birthday celebrations and other occasions of pleasure.


White wine of a sweet variety
Brandy of moderate quality
The juice of oranges, lemons & other citrus fruits
Peel of the same fruit
Fine sugar
Nutmeg, grated fine

Combine the citrus juice, nutmeg & brandy in a dark colored bottle, keeping it well closed for no less than 3 days. Unlike many common shrub recipes, this variation needs no long infusion period. In fact, the shorter wait makes it particularly suitable to last minute celebrations when no other punch can be properly made. On the day you wish to consume the shrub, combine the wine with the brandy infusion in a large bottle or bowl, keeping in mind the proper proportion of 3 parts wine to 4 parts brandy. Add sugar to taste. Strain through flannel if needed to remove sediment. Serve in small cordial or dedicated shrub glasses. Be prepared to readily refill the glasses as they are quickly emptied of this delicious liquor.


~~~
Works Cited

E. Smith, The Compleat Housewife or, Accomplished Gentlewoman's Companion (London, 1739)


John Daview, The Innkeeper and Butler's Guide, or, a Directory in the Making and Managing of British Wines (Leeds, 1810)

Labels: , , ,

Tuesday, January 21, 2014

"No One Can Be Caught In Places He Does Not Visit"

 Or what to expect when visiting an 18th century coffee house or its 21st century recreation.

Mad Dog in a Coffeehouse, Thomas Rowlandson, 1809.
One cold day in December 1663, Samuel Pepys did what many men before him, and even more after him, would do; he went to the coffeehouse. He was greeted upon entering the central room of the Coffeehouse by a rotund yet energetic coffee man with an exclamation of “What news sir?” and the offer of a steaming dish of coffee, which Pepys took happily, adding just a bit of sugar to sweeten the bitter brew. From here he wound his way through the crowd to a heavy worn table which filled the center of the otherwise open room. Scattered across the wooden surface were various newspapers, a well-worn copy of the French play “Heraclius, Emperor of the East. A tragedy”, three flickering candles despite the daylight hour and, mixed among it all, dishes of coffee in every state of consumption. Surrounding the table Pepys found an assortment of men with whom he would share “very good discourse” some that he was well acquainted with, having shared conversations in the past, others that he had not yet met, a fact that did not limit their discussions in any way.


Among the coffeehouse patrons Pepys found the flamboyantly dressed “Secretary of the Virtuosi of Gresham College” with whom he would enjoy a “very fine discourse” concerning a newly invented instrument to be tried at the college the following day. Next his attention was drawn to a less academic but no less enthusiastic “discourse with an Iron Merchant” where Pepys discovered the difficulties experienced in that trade between the Swedes and English. A thin boy, no more than 12 years old scurried among the crowd, ensuring that the men's dishes of coffee remained well supplied. At the cost of only one penny a dish, the men were unlikely to complain about this constant attention, preferring instead to continually sip at the hot liquor without interrupting their adamant discussions.


The Discomfited Duellists, 1784.
From across the crowded room Pepys saw his good friend, taking his dish of coffee he left the iron merchant and crossed to “[sit] by Mr. Harrington, and some East country merchants” whom he found “talking of the country about Quinsborough” and “the manner of putting their nets into the water” during winter. Soon his attention was distracted by the vociferous argument at another table, as the patrons dispute the suggestion that “all the opinion now is that the Dutch will avoid fighting with us at home. . . ” Finally, Pepys found his acquaintance Mr. Harris, who he “was to meet” at the coffeehouse for business. The two eventually leave the coffeehouse but most certainly returned another time for the latest news, freshest advices and camaraderie of other gentlemen such as had been enjoyed that day.

Widow Black's Coffeehouse, 2012.

I can not promise that if you happen "to stroll into a little coffee-house", perhaps on the edge of a green field, the checkered floors & a lot hanging roof, that you will find such entertaining friends as Mr. Pepy's did, or the excitement that Mr. Rowlandson drew. However, I can promise a constant supply of the finest true English coffee, the freshest advices from around the colonies & indeed, across the seas. But most of all, I can promise an experience as true to that of the original English coffeehouses, an experience that no other reenactor or historian has attempted to duplicate purely for the enjoyment of their fellow reenactors. I look forward to seeing many of you at the Widow Black's Coffeehouse "this year", whether that is 1650, 1760 or 1812.


For more information on visiting the Widow Black's coffeehouse, the Widow's lecture schedule or to bring the coffeehouse to your event; Please Visit the Widow Black Coffeehouse on Facebook.


~~~
Works Cited

Chole White, Camaraderie of the Cup: The 18th century English coffeehouse & the development of an enlightened public sphere (2011). 

Thomas Rowlandson, Mad Dog in a Coffeehouse, 1809 (Museum of Fine Arts Boston).

Samuel Pepys, Mynors Bright, and Henry B. Wheatley, The Diary of Samuel Pepys, Transcribed by the Rev. Mynors Bright from the Shorthand Manuscript in the Pepysian Library at Magdalene College Cambridge Vol. 1 (New York: Heritage Press, 1942), 8 March, 1663/4.

Joseph Addison & Richard Steele, The Spectator, Volume 5 (Philadelphia: Robert Desilver, 1819).

Labels: , , , , , ,

Tuesday, December 03, 2013

You'll Get A Pie In The Sky When You Die

or making the ubiquitous Cheshire Pork Pie.

It seems everyone & their mother has made an 18th Century Cheshire Pork pie at some point. The origin of this pie's popularity likely comes from it being featured on Colonial Williamsburgs "History is Served" website. Popular among reenactors, would-be historic foodies & the occasional Anglophile, History is Served offers modern redactions of historic recipes from the 18th century. In this way it is useful for folks wanting to try something historic, while still using readily found ingredients, tools & standard measurements.


Although the original isn't particularly difficult, the Williamsburg's Cheshire pork pie is one of the most popular recipes from the site. Don't just take my word for it, check out Revolutionary Pie's version, 19th Century Cookery's take and The Regiment Cooksite's review. Those don't even take into account the folks, like me, who worked from the various historic versions as well, like Bite from the PastThe Historic Cookbook Trials.

I have an unnatural love for making pie in camp, as I'm sure those of you who have been following Slightly Obsessed over the last 7 years may have noticed. My first camp pie experience came on a whim. I simply had nothing special to do in camp that day, the coffeehouse was still in its infancy & there were no school children to educate. Instead I decided that I simply had to make a pie, despite not having a single ingredient or even a formal recipe beyond what I remembered from a very brief reading. The result was amazingly tasty & I'm afraid the success spoiled me for ever baking a pie any other way!

When it came time to make this most recent pie, I can at least say I was a bit more prepared. I have started hosting friends for dinners in the coffeehouse on Friday evenings. It's a nice way to begin the weekend; those of us who have been demonstrating at the school days are ready to sit back & relax after the hectic day & those that are just getting into camp are always happy to have dinner plans already taken care of by someone else while they tend to their own chores. So I knew that Mr. McF--- & his lovely wife would be joining me on this particularly cold & damp October evening. What better than a warm pie & a glass of shrub to warm up the evening with friends?

The Widow's Rogue Version of a Cheshire Pork Pie

Ingredients:
  • Pork shoulder roast left over from a previous dinner.
  • A couple of potatoes from the coffeehouse larder.
  • Some apples, because you always have a few rolling around in camp.
  • A Splash of white wine & an extensive conversation with the new servant Jane on what constitutes a proper splash. 
  • A pinch of Cinnamon, Nutmeg, Mace, Salt, Pepper & what ever other spices sound good at the time.
  • 1 batch of "The Only Pie Crust I Know By Heart".

A Cheshire pork pie waiting for baking.


Directions:

Get a good solid fire & base of coals going.

Dice & fry the pork in a bit of butter if it needs it. Cook only until it is no longer pink but not so long that it becomes dry. Historic recipes tend to put the pork directly into the pie but we can't completely forget modern food safety.

While the pork is cooking, slice the potatoes & apples. Make sure to feed a few of those apple slices to the 3 year old who is now starving after a day of playing in camp & can't wait for formal dinner time.

Make a double pie crust. I have a standard pie crust memorized & can duplicate it in camp, whenever the whim strikes. Use what ever is your favorite.

Get to assembling your pie, finally!

Lay 1 crust in the bottom of your pie plate. Pile in as much of the pork, apples & potatoes as you can comfortably fit into the plate. This will cook down, but not by much so keep that in mind when filling.

Sprinkle your seasonings over the filling. We used salt, pepper, cinnamon & nutmeg but sage might have been a nice choice.

Add a splash of white wine, just enough to add a little moisture to the filling mix but not so much that it leaves the pie crust soggy. My servant insists this amount is "2-3 tablespoons" but I refuse to be that scientific about my cooking. While you are at it, add the remaining white wine to the very large bottle of shrub waiting for the evenings revelry.

Cover your pie with the second pie crust & decorate according to your personal preference & the quality of the expected dinner guests. I went with a very simple fork pressed edge & a few venting slits on the top, pretty but practical for a meal with the local distiller & his wife.

Set-up your bake kettle with a trivet in the bottom to prevent the pie bottom from coming in direct contact with the hot kettle. Place the prepared pie into the kettle & cover, topping with a few hot coals.

Rotate the kettle & lid in opposite directions in roughly 15 minute increments to ensure even baking. Check the pie after 30-45 minutes, depending on the strength of the fire. Our pie was finished, in fact a little burned on one corner, after only 45 minutes. However, it could take as much as an hour & a half, so be patient.
Remove from the fire, serve & enjoy.

Labels: , , ,

Thursday, April 21, 2011

Putting Your Best Foot Forward

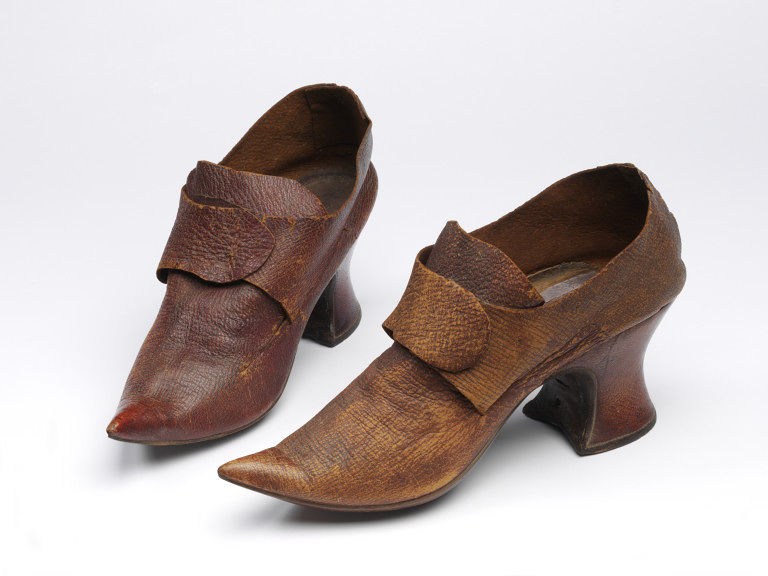
A lot of people have been discussing 18th century shoes recently and I couldn't help but jump into the fun. Following is a little humorous little review of the shoes listed in the Virginia Runaway Advertisements, one of my favorite on-line sources for clothing among the common class in the 18th century. If you have ever wondered how to describe the clothing we wear at reenactments, look no further.

Of 547 listings for “Shoes” in the Virginia Runaway archive

Quantity of Shoes:
A single pair shows up most often, but there are several individuals who needed a spare so they took two pair of shoes (13 people listed between 1768 & 1776 took two pairs), or three pair of shoes (1737 & 1773) and one greedy fellow even took with him 4 pair of shoes (1771)! There was also a man who apparently couldn't decide what kind of footwear he wanted, so he took “both a pair of pumps and a pair of shoes” (1772). Not to mention the man who stole at least 6 pairs of children's shoes.

Gender:
Gender is rarely mentioned when referring to shoes, presumably because men would be wearing and taking men's shoes and vice versa. The few times gender is mentioned however are a “pair of men's shoes” (1738), “country made women's shoes” (1746), “three Pair of Boys Shoes, three Girls ditto” (1755) which was also mentioned above and “two Pair of Women's Shoes” (1771).

Materials:
The majority of shoes mentioned do not list material. However, of the materials that are mentioned, leather is the most common. There are shoes made of “leather” (1738 & 1752), “Leather pumps or shoes” (1739), “the other [pair] red Leather” (1755), shoes of “stiff leather“ (1771), “English made Leather” (1773), “new Leather Shoes, with wooden Heels” (1773), “a pair of leather shoes, with wooden heals” (1775) which were apparently not so new anymore, and a pair of “high-heeled leather shoes” (1776). There were also “Leather-heel'd sharp-toed Shoes” (1752) and just plain “Leather heeled“ (1773) shoes.

Only a few examples of non-leather shoes are listed in the runaway advertisements, which makes sense considering the generally lower class status of the runaways. What good are pretty silk shoes going to do when you are either working, or escaping from your master? There are listings for “one Damask, [and] one Callimanco” (1755), “blue calimanco shoes” (1767), “black calimanco shoes” (1770) and "old black calimanco shoes with plain silver buckles” (1772).

Colors:
Not much is said about the color of shoes worn by runaways. The few listings include a “pair of black shoes” (1768), “country made shoes not blacked “(1771 & 1775) and a pair of “white Shoes” (1774), hopefully not worn after Labor Day.


Closures:
Buckles show up the most often when closures are mentioned. If you couldn't afford buckles or had sold them for gin money though, don't worry! An “old Pair of Shoes tied with Rope Yarn” (1755), “shoes tied with leather strings” (1768 twice), “tied with strings” (1768, 1772 thrice) when leather strings weren't available, will work. There are shoes listed with “strings” (1768, 1775) or “having stings in his shoes” (1769, 1772), tied, or even “to tie” (1771) for those times when you haven't gotten around to actually tying them.

Can You Describe Them?
Are they a Pair of “neat stitched Pumps” (1771), “new or almost new” (1763), good, neat, plain shoes or old, poor, “coarse” (1772) or “coarse store shoes” (1770), only “pretty good” (1752), just “bad shoes” (1776) or worse, “very bad shoes” (1768). They could be a “little worn” (1775), “part worn” (1770), “half worn” (1763) or “pretty much wore” (1767).

Would you call them “thin” (1770) or are they “solid or strong thick, shoes” (1770), with “uncommonly thick soles” (1769)? They could be “handsome square toe'd Shoes” (1738) or “old square-toe'd Shoes” (1739) and not so handsome a year later. They could even be “peaked” (1768) or “half soled” (1772) if that's the way you like them.

Speaking of soles, shoes could be “hobb nailed” (1738), with “hobnails in their shoes” (1775), “nailed round with hob nails” (1769), “nailed all round both heels and soles” (1775) or just “with the heels nailed” (1767). You could have the “Soals (sic.) thick set with Hobnails” (1773) and the “bottoms very broad and nailed” (1771) or they could be just “small old shoes, with nails in the heels” (1774).

Who Made Them & Where?
Negro or “negro made” (1775 twice), Country-made, Common made or just common? “Store shoes” (1770, 1774) “such as are usually sold in Stores” (1772), “stout imported Shoes” (1773), English or English-made, “British made” (1774), “London made” (1775). They could be Virginia, “London Fall Shoes” (1745), “Glasgow coarse made Shoes” (1773), “Scotch Shoes new soled” (1750-1) and later just “Scotch shoes” (1771) once the soles break in a little.

What To Wear With Them?
The majority of folks mentioned wear shoes and stockings, while some unfortunate souls have neither shoes nor stockings, poor fellows. A few people have shoes without stockings but no one is mentioned wearing stockings and without shoes. How logical of them!

What About Bob?
One fellow named Bob (1774), “can make shoes, play on the fiddle and is fond of singing with it”, presumably not all at the same time though, while another fellow by the same name only “pretends to make shoes” (1767). Wonder if it is really the same guy and he got better at making shoes and picked up a hobby in the seven years between the ads?

Say What?
Sometimes you just can' describe them! There is a listing which includes “old shoes, turned pumps” (1775) and another for “either shoes or boots” (1774) in case you like a little more variety in your footwear. The “new black grain dogskin shoes” (1775), should be counted under leather, right? Meanwhile the “stitch down shoes “(1768), “sand shoes with uncommon thick soles” (1769) and “light Pair of Shoes with Straps” (1773), defy my ability to describe them. Suffice it to say, these guys weren't barefoot!

One listing even includes a horse with his “hind shoes feathered” (1774). After all, we wouldn't want to leave our four legged friends out.
***
Works Cited:

Virginia Center for Digital History. “Virginia Runaways,”
http://www2.uvawise.edu/runaways/ (April, 2011).

Shoe, leather, wood and linen thread, 1700. (Victoria and Albert Museum, London). http://collections.vam.ac.uk/

Childrens Shoes, leather, late 18th century. (Brooklyn Museum Costume Collection, The Metropolitan Museum of Art, New York). http://www.metmuseum.org/

Shoe, Silk damask, linen and leather, 1760-1770. (Colonial Williamsburg Collection, Williamsburg). http://www.history.org/History/museums/index.cfm

Labels: , , ,

Friday, May 14, 2010

“And the Spring comes slowly up this way.”

Things have been busy in my life recently, and while I have gotten a lot done in the past 4 months, sadly little of it has been reenacting oriented. Still, a few small projects always seem to creep in.

First was a very special project for a very special little girl. Unfortunately until she decides to join us the details will have to wait. Aren't I the worst kind of tease?

Second was the long awaited project of re-sizing one of L's linen gowns. A few years ago, when I had the time and the fabric to do so, I made L an "extra" gown. I sized it up from the blue wool gown she was just beginning to fit into with the intent that she would grow into the new gown, as kids tend to do. Unfortunately, I didn't take into account the way my child grows! I enlarged the gown in the length but also in the width. 2 years later and she still hadn't filled out in that width, although the length is now almost not enough. Just this past week I finally sat down & took out the excess size from the bodice, re-pleated & re-attached the skirt & added ties to the back. Now not only is there one less UFO* in my sewing room but L also has a second 18th C gown. Come summer when she returns to camp coated in mud, soaking wet & complaining, she will have something fresh to wear!

The third project on my list was a silk bonnet for L. She has light sensitivity & in modern life usually wears a baseball cap or sunglasses to shade her eyes while out of doors. In reenacting life neither of these was a viable solution. However, a brimmed bonnet is. On our trip to Minnesota last November L got to choose any fabric that she wanted from the silk department at SR Harris. She choose a very dark, almost black, navy blue silk taffeta. I decided to use the Kanniks Korner pattern for her bonnet strictly as a size guide. The instructions, well, anyone who's read this blog before knows that instructions are the first thing that I ignore. I did want this bonnet to be large enough that L could continue to wear it as she grows into adult sizes. I decided to use 2 layers of buckram & inexpensive floral wire in the brim to support the shape. The brim is also lightly lined with some scrap of dark blue wool. Unfortunately L has yet to wear the bonnet for more than a moment while fitting. What's a hard working mother to do? Why borrow the bonnet for herself of course!

The final project on my list has been the reorganization of all my research materials. When I first started reenacting I kept all my book lists and notes in a simple spiral notebook. However, this method hasn't worked out in the long run, especially as I collect more & more images to go along with my readings. Then when you add in the number of journal articles and books that are now available as digital copies through Google Books and EBSCO, my old fashioned notebook just wasn't enough. Over the past month I've gone through everything, sorted into relevant eras and specific categories, deleted any duplicates, double checked that every image has a date, author or at least location attached to it, made a database of all the books & articles I have read and those that I still need to read and best of all, loaded this wonderfully organized collection onto one flash drive. Now when ever I need anything, it is right there at my finger tips. What will I do with all this easy to find information? That, my friends, is another long term project that you all will have to wait & see!

*A UFO in sewing lingo is an "Unfinished Object" ie those projects that are half finished & waiting for the right time to be done.

Labels: , , ,

Tuesday, May 26, 2009

Stay the Course, Part 3

Or how to construct mid 18th century fully boned stays with a stomacher front.

Step Three: Finishing!

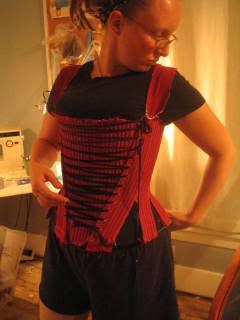
Please note: I did not take photographs while finishing the red stays with the stomacher front that the previous two sections of this tutorial use. In fact, I've never actually finished those stays & have been wearing them unlined for nearly a year (*blush). Instead we will use a pair of blue strapless, front & back lacing stays that I am constructing for a friend as our example throughout this stage of the tutorial. Luckily it doesn't matter what style of stays you are working with, the construction process is always pretty much the same.

Part 1: Binding

Materials:

Previously constructed stays using Parts One & Two.
Needle
Sturdy thread
Binding material. 3/4" strips of chamois leather, dutch linen tape or worsted wool tape are my preferred materials.

Lay binding right side to right side on stays edge. Binding only needs to cover around the very top and bottom of the lacing edges but you can bind around all edges if you want.

Stitch ~1/8" from binding edge using a back stitch for extra security.

Be careful stitching binding around interior curves of the tabs. This takes some fiddling to get just right. Swearing like a sailor while working on this step always works wonders for me.

Fold binding over to the interior leaving ~ 1/4" on the outside.

Whip stitch binding to the interior of the stays. This doesn't have to be perfect, pretty stitching, as it will be covered by the lining in the next step. Some coaxing might be needed around any curved edges and again in those dreaded inner curves of the tabs.

Take a break, your fingers probably hurt like crazy after sewing through all that leather! You can wear your new stays full time from this point. Lining is a nice finish though, keeps the interior more protected from sweat & body oils, provides a little more padding between you and the boning and when installed correctly, can easily be taken out for laundering or replacement without having to disassemble the entire pair of stays.

Part 2: Lining

Materials:

Previously constructed & bound stays, see above.
Previously customized stays pattern from Part 1 (optional)
Needle
Sturdy thread
Light to mid weight linen. This is a great place to use scraps.

Cut out the lining using your customized stays pattern as a guide or roughly trace the outline of the already constructed stays. Lining can be cut as 1 piece, or as several pieces corresponding to each piece of the stays. It's your choice, depending on how much extra work you want to do & how large your scraps of fabric are. The lining pieces don't even have to match, so use up those scraps!

Lay lining piece(s) on stays interior, wrong side to wrong side.

Turn in the edges so lining barely covers binding edge. If using separate lining pieces for each panel turn in all edges over lapping the seams just slightly. Don't forget to turn under the outer edge so your lacing holes remain accessible!

Pin liberally, adjust lining so it lays neatly & smoothly. Re-pin several times to get the lining just so. One can never use too many pins at this stage.

Whip stitch the lining into place along the binding edge, along the outer edge against the lacing holes & along where the lining panels join if necessary.

Use care when working around the interior of the tabs as that is the trickiest area. Trimming the lining into a "Y" shape at the top inner curve of the tabs can make tucking the lining to the inside easier but it is still going to be a fussy job.

Break out a bodkin & the champagne , your stays are finished!

Labels: , , ,

Sunday, March 29, 2009

Lucy Locket Lost Her Pocket

Or making a pair of embroidered pockets for a young girl.

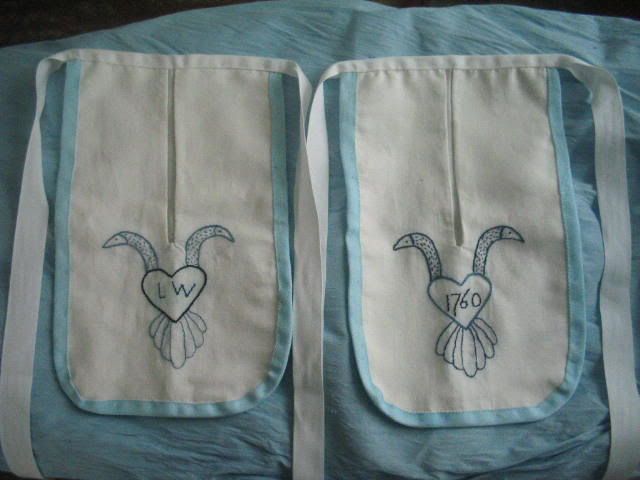
I constructed this pair of pockets for my daughter L, who has grown enough in the past 3 years to need a larger pocket than the first I made. She also needs more room to carry her ever growing collection of 18th century trinkets.

The pockets are sized right between her original "small" pocket and the size I use for my own, measuring approximately 8" by 13". The front opening is 6 inches long, scientifically measured by having her lay her hand out on the pocket before cutting. The pockets themselves are made from 5oz linen, found in my scrap basket and dutch linen tape from Wm. Booth, Draper. The body binding was dyed using just a pinch of "baby blue" fiber reactive dye. Not a period choice, but what I had on hand and needed to use up anyway. Since my intention is for these pockets to last until L is a young woman I constructed them on 2 separate lengths of tape. This way they can tie both in the front & back, allowing the waistband to grow as she does.

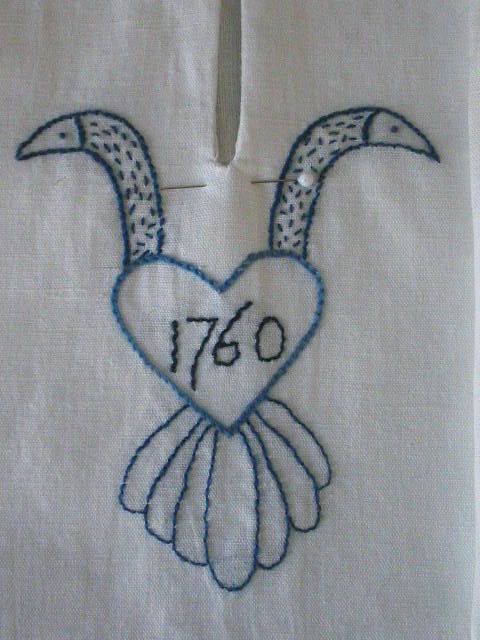
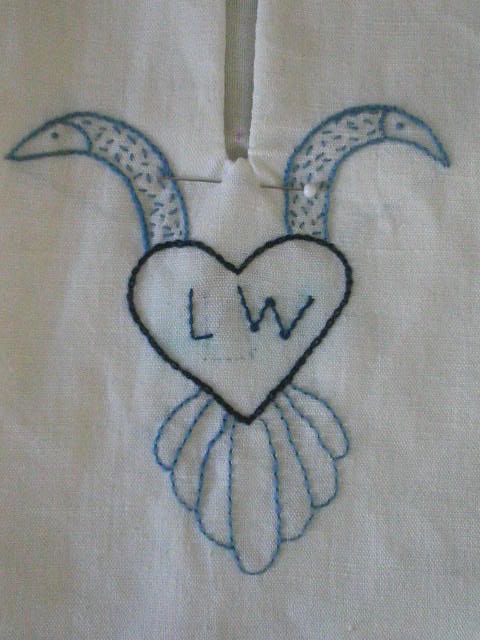
The embroidery is worked on 5oz linen from my endless collection of scraps using the beautiful woad dyed wool from Renaissance Dyeing (available through Reconstructing History). I used these as a practice pieces, since embroidery is still a rather new hobby of mine. The design consists of stem stitch, back stitch, french knots, seed stitch & wrapped running stitch. I varied the colors used but kept the stitches the same in each piece. The finished work is them layered with the working portion of the pocket and bound around the edges. This protects the back of the embroidery & makes the pockets a little more durable. For my readers who have seen just how filthy L gets at events, it's pretty clear why they need the extra layers!

The embroidery design is not a historical recreation, just "historically inspired". I saw a similar design sometime last year while searching for 18th century motifs. Sadly, I can not remember where I initially found it. It was most likely one of the endless pile of library books. My one complaint is that her initials are so hard to embroider! After several tries I finally had to settle for an only slightly lopsided "W".

Up next, my (entirely) hand sewn shift!

Labels: , , , ,

Sunday, January 18, 2009

Stay the Course Part 2

Or how to construct mid 18th century fully boned stays with a stomacher front.

Step two: the construction.

If you're just joining us, please refer to Part 1 for the fitting tutorial. Stays are custom items so the most important step is in the fitting. Take your time making the pattern perfect for your shape before proceeding. Trust me, it's well worth the effort.

materials

Custom pattern from Stay the Course, Part 1.

~1 yard chosen outer fabric. Linen or light weight wool are good choices, easy to come by & work well.

~2 yards inner lining fabric. Heavier weight linen works wonders as inner lining on stays

1 roll reed boning of your choice. I have used both 1/4" full round and 1/4" half oval reed. The full round is significantly stiffer but both work well. The choice will depend on how firm or flexible you want the final stays to be.

plenty of durable thread

ruler

disappearing marking pen or chalk

something good to watch on TV or a new audio book to listen to while you work.

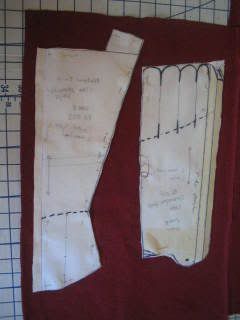
1. Cut 2 layers of piece out of inner lining leaving a generous seam allowance around all sides. If you are, however, working from random scraps as I am, then cutting directly on the pattern lines might be necessary. Do Not separate the tabs at this point, instead cut a box around them. You can almost see this in the photograph below. Leaving the tabs for later makes the entire piece so much easier to handle & insures that your boning channels don't land on a cut line.

2. Lay your lining & pattern pieces on top of your outer fabric. Cut out the outer pieces, leaving the same generous seam allowance around all sides, but especially around the sides that will be connected.

3. Measure the width of your reed and round up slightly. This make it both easier to slip the boning in each channel & accounts for any variation in each piece.

4. Measure & mark your boning channels. This is the point where I usually find myself running to the V & A or another museum site to look at every extant example of stays I can find. Take your cue from them as to which direction the channels on each piece of your stays should run. Straight at the center back and lacing strips yet with the direction of the tabs seems to be the most common arrangement I have seen.

5. Sew all those channels. If sewing by hand, a back stitch is the best bet as it is very sturdy. On the sewing machine a nice small stitch is preferred. When sewing the channels by machine it is faster not to cut the individual threads until the last line is reached. Instead, simply move the needle to the next line leaving a short tail in between each. These strings can all be pulled to the inside of the stays once each channel is sewn.

6. Fold the excess outer & lining fabric to the inside of the stays along the pattern line. Why did we leave that extra fabric? Two fold (sorry bad pun!). One, because it allows the material to shift while sewing the boning channels without disturbing the final construction and two, so that there is excess to "let out" should we need to expand the size of these in the future.

7. Place 2 pieces right side to right side, lining up the edge we just folded inside. With a sturdy thread whip stitch the two sections together. Stitches should be consistent and close together, these are the main seams after all. Many seamstresses will use this seam as the second side of the last boning channel. I prefer to sew the channels fully by machine & simply sew over that line when whip stitching sections together. Either way is just fine.

8. Mark your lacing holes. The back of these stays is laced using spiral lacing. The stomacher front is laced using 1 cord through parallel eyelets. On front & back lacing stays without a stomacher it's best to use spiral lacing on both pieces. I always check my marks at least twice, mentally lacing them up to check the arrangement & spacing.

9. Sew all those eyelets. You are allowed 1 complaint about how much of a pain they are to sew per hole. In this pair I stitched the eyelets twice, going around once with 5 or 6 stitches to hold the opening, then filling in the space on the second round. I have since been advised to use a doubled thread & only sew around the holes once. Surprisingly, I've found the double thread to make a much nicer, durable opening & it doesn't seem to take as long!

10. Decide where the best separations for your tabs are going to be, making sure that no tab as too few or too many boning channels. I generally try to have ~4-5 channels per tab. Mark & cut the tabs apart.

10. Stuff each channel with reed. I'm using 2 pieces of 1/4" half round reed back to back to create an oval reed. I've found this to be both supportive & flexible. I also discovered that very lightly waxing each piece of reed helps cut down on splintering & keeps it from catching on any stubs in the material as it's being pushed into the channels.

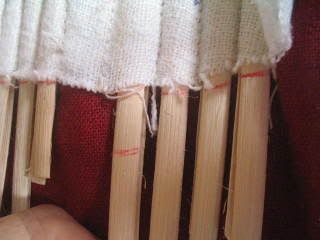
11. Trim each reed to fit leaving an ~1/4" space at the top & bottom of each channel. This gap will make adding the binding easier in the future. The photo is of how I mark the individual reeds. This method doesn't conserve much reed, but it's what I've found works best for me.

11A. (optional) If you are going to be wearing these stays prior to finishing the binding, as I did, it's best to sew along the top & bottom of the channel's to secure the reed. This little trick gave me the time to wear the stays before I found the time to fully finish them.

12. Remember that outer fabric that was folded to the inside? Now is the time to tack it in place with a loose whip stitch. This isn't mandatory, but it does make for a nicer inside. Just try not to stab yourself & bleed all over the stays. Ouch!

13. Repeat sewing & stuffing the boning channels for the stomacher front. The boning can either run vertical or connect in a center "V", which is very attractive but a little harder to bone.

14. Attach the straps. Leave extra length at the front for customization. While wearing the stays, mark where the straps hit the front edge & trim to fit.

15. Check yourself out in the mirror. Marvel at the lift, the curves & all the hard work that's gone into these stays so far.

16. Take a nap before proceeding to Step 3, finishing!


Labels: , , ,

Thursday, January 01, 2009

The 18th "Scent"-tury

or the Manner of making various Sorts of thefe little Bags or Sachets to scent linen or wear in the pocket.

To Make A Sweet fcented Bag to wear in the Pocket
TAKE thin Perfian and make into little bags about four inches wide in the form of an oblong fquare. Rub the infide lightly with a little Civet then fill them with coarfe powder a la Marechale or any other odoriferous Powder you chufe to which add a few Cloves and a little Yellow Sanders beaten fmall and fow up the mouths of the bags.

FOR this purpofe may be ufed different parts of the Aromatic Plants as Leaves of Southernwood, Dragon wort, Balm Min,t both garden and wild Dittany, Ground Ivy, Bay Hyfop, Lovage, Sweet Marjoram, Origanum, Penayroyal, Thyme, Rofemary, Savoury, Scordium, and Wild Thyme. The Flowers of the Orange, Lemon, Lime, and Citron Tree, Saffron, Lavender, Rofes, Lilly of the Valley, Clove-july-flower, Wall Flower, Jonquil, and Mace. Fruits as Anifeeds &c The Rinds of Lemons, Oranges, &c Small green Oranges, Juniper berries, Nutmegs and Cloves. Roots of Acorns, Bohemian, Angelica, Oriental Coitus, Sweet Flag, Orrice, Zedoary &c The Woods of Rhodium, Juniper, Caffia, St Lucia, Sanders &c Gums as Frankincenfe, Myrrh, Storax, Benjamin, Labdanum, Ambergreafe, and Amber. Barks as Canella, Alba, Cinnamon &c

Care muft be taken that all thefe ingredients are perfeftly dry and kept in a dry place. To prevent their turning black add a little common Salt. When you chufe to have any particular Flower predominant a greater quantity of that plant muft be ufed in proportion to the other ingredients.
Pierre-Joseph Buc'hoz, The Toilet of Flora; Or, A Collection of the Most Simple and Approved Methods of Preparing Baths, Essences, Pomatums, Etc. 1772, pp.216-219

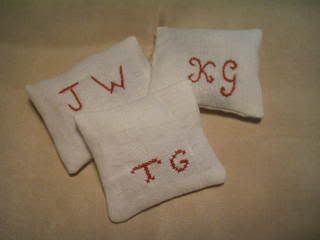
The above pictured "bags" are remembrance gifts to a few lady friends. They are a quick way to practice some period needle work skills; stem stitch, split stitch & (not so well counted) cross stitch and a nice small detail to have in ones kit. The bags measured ~4x5" prior to sewing. I added a little roving to each, not enough to make them pillows, but enough to give them some puff and softness. They are scented with a combination of cloves, anise seed and juniper berries, all items dug out of my spice cabinet and appropriate to scents in the last half of the century as seen in the suggested list above. I hope the ladies enjoy them as much as I enjoyed making them, I just might have to make a few for myself now as well.

Labels: , ,

Thursday, November 27, 2008

In One Autumnal Face

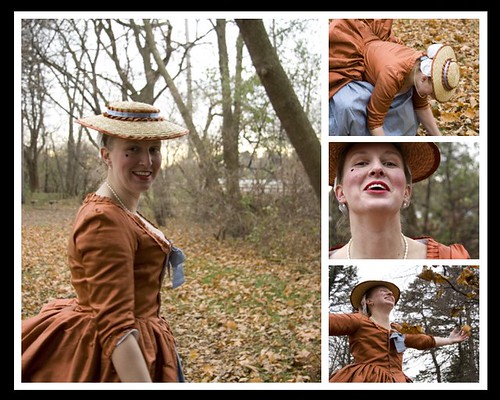
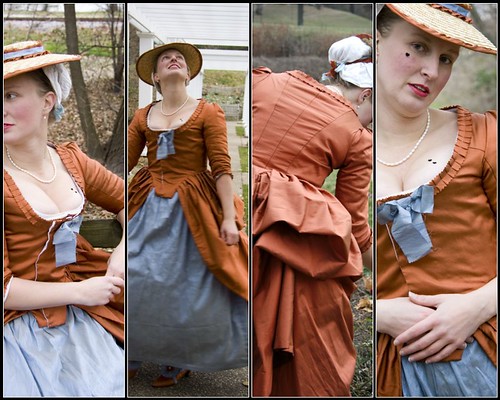
Just few little photo mosaics from a very successful photo shoot this past weekend. The gown shown is my 1770 era silk polonaise, affectionately dubbed the "Pretty Penny Gown". The matching hat & shoes were finished just in time for this years ONW/Colonial ball earlier this month. I'm wearing it over my standard underpinnings; red stomacher fronted stays, linen petticoat and cuffed linen shift. I did splurge and wear the delectable silk stockings from Spencer's Mercantile, which I received as a gift from my dear friend T. The outfit is accessorized with fresh water pearl drop earrings & matching necklace. Of course I couldn't dress up without including a few beauty marks. These are simple hearts, as I seem to have misplaced the tiny dancer I cut last year.

Photos are courtesy of my wonderful & talented friend A. I can't begin to thank her enough for braving the 35* weather with me (even though she had gloves!), chasing me around the gardens, making me laugh endlessly & most of all just being there to work on this project with me. She an extraordinary friend & I'm blessed to be the recipient of her talent.

All images were taken at Sinnissippi Gardens, a beautiful public garden and greenhouse in Rockford IL.

Labels: , , , ,

Friday, August 15, 2008

Pirates of Paynetown Recap

Another quick recap as I pack up for my historic trip to Jersey next week.

Last weekend we attended Pirates of Paynetown, a wonderful event on Lake Monroe outside Bloomington IN. What is special about this event is the focus on small water historic boats. Everything from pirogues, dorries, skiffs etc.

As usual, I spent the majority of the weekend demonstrating to the public and keeping everyone in much needed coffee after late nights at the tavern. During the battles I helped the terribly undermanned town defend itself by tending match with the cannon crew. Of course, the town falling into the hands of the pirates had nothing to do with half our cannon crew secretly sympathizing with the rogues. Nope, nothing at all!
Sunday afternoon I had my promised sailing lesson. The weather was perfect and after only hitting one dead spot in the water, I was able to catch a good wind, tack several times with ease & guide the Tantrum back to shore. The more I practice, the easier the reverse direction of the tiller & keeping proper tension on the mainsail becomes. Although my shoulder was a bit sore after the exercise, I wouldn't have passed it up for anything!

Unfortunately, it seems the "professional" photographers at the event aren't much on coffee, as there isn't a single photo of Black's Coffeehouse, or myself from the entire weekend. Disappointing, but photographic proof isn't the reason that I reenact. The 2 young teen girls who spent a good 30 minutes talking with me about coffee and then brought their mother over to "meet the coffee lady", however, is!

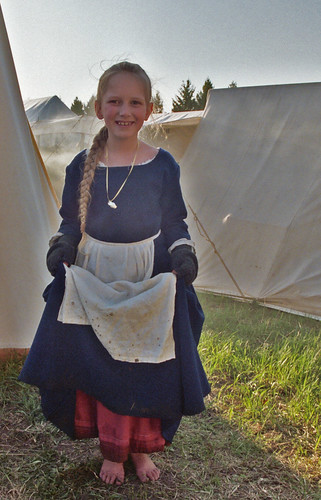
L spent most of her time running a muck with the other reenactor children; splashing in the water & sand at the beach, running the resident dog from one end of camp to another, watching the Amazing Budabi Brothers juggling act and threatening one playmate with a wooden spoon when he tried to step on a grasshopper. I managed to get her to wear her bun cover cap all day Saturday, though not without serious bribery. The neckerchief took no convincing. It's silk, dyed with natural dyes at the Pike River Rendezvous, by our camp mates V & A. We both love the bright, orange-peach shade of the material.

All in all a very nice weekend event and another that I look forward to attending next year.

Labels: , , ,

Friday, May 09, 2008

Bloody Lake Recap

Just a few photos to share & a quick recap of last weekends event, The Bloody Lake Rendezvous. All photos are thanks to Karen Garland of Brigands Folie

To start, my darling daughter L, the camp urchin.

Here she's covered in mud after jumping into an ankle deep puddle. She's wearing a typical back lacing child's gown, hand sewn from blue wool, lined with blue linen. The material is from her mantua, which no longer fit either in size or time period. She is also wearing a linen shift, apron and petticoat. Underneith she's wearing her hand sewn wool petticoat, considering how cold it was most of the weekend I don't think she took it off for more than a moment. Her cap & neckerchief had disappeared for the thousandth by the time this photo was taken. The necklace is a trade silver owl that she picked out at the Midwest Rendezvous last summer. It's her favorite piece of period "bling". She seems rather cheerful for a wet & cold child with no shoes doesn't she!

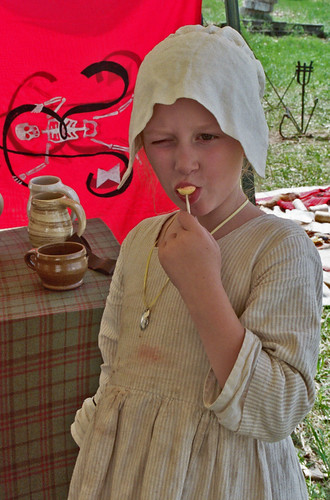
Later in the weekend the weather warmed up quite nicely, resulting in this dirty & devious look. This is the same dirty striped linen gown as she wore last year at the Pike River Rendezvous. I added new, longer sleeves and patched one of the larger rips with a scrap of hand dyed yellow linen. It is her favorite gown to wear because she can get as dirty as she wants without harming the gown. As you can tell, she takes her getting dirty very seriously. Oh look, we found her cap again & this time it's managed to stay on for more than a few minutes. I can't account for the particularly "pirate" expression on her face. She looks to be plotting something particularly sneaky though.

Finally a few shots of me.

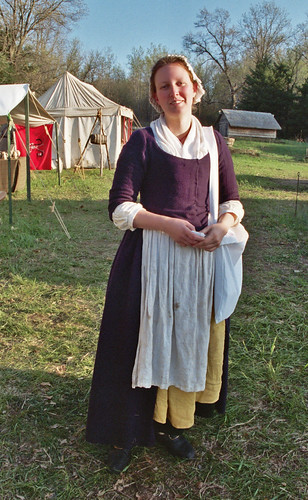
Here I'm wearing my 1770's wool polonaise gown, the same gown that I wore to the ONW/Colonial ball in November. It's since been shortened to a reasonable camp follower length & its proving to be quite nice in the cool weather.


I've accessorized with several layers in order to offset the brisk weather. First I'm wearing my cuffed linen shift, 2 neckerchiefs; an under layer of silk with an over layer of linen. I'm wearing no less than 3 petticoats, 2 linen & 1 wool flannel. Filthy apron, wool stockings, buckled shoes & my favorite pleated cap complete the outfit. This is obviously mid afternoon, as the sun had beaten out the passing rain clouds. The haversack on my shoulder, while not documentable for a woman, is the perfect storage location for the various newspapers & magazines available for reading at Black's Coffeehouse. Be sure to stop by at the sign of the Janus Face for all the most recent news from London and around the colonies.

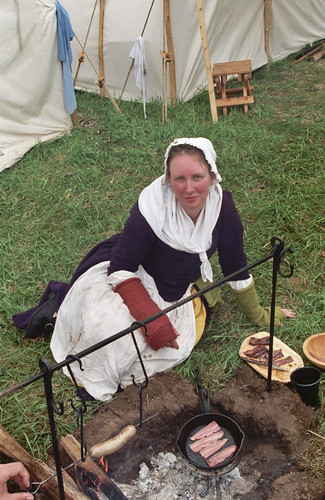
Earlier that same morning I was busy making breakfast & staying warm near the fire. Sure waking up at dawn to get the fire going is tough, but the benefit of staying warm no matter the weather is well worth the early wake-up call. Here I've got on a few extra layers. My green fingerless mitts; one on, the other tucked in my apron waistband, a heavy fulled wool mitt that I use as a pot holder and my linen coif draped around my neck rather than over my head where it belongs. Breakfast consisted of bacon, mushroom sausage, bread, cheese and butter & plenty of strong black coffee. I fell in love with the trivet & enjoyed practicing hearth cooking techniques all weekend. I'm rather proud too, as that fire was started in the rain, with nothing but period materials & survived though everything that the early May weather could throw at it.


Labels: , , ,

Thursday, April 10, 2008

Once more unto the breach, dear friends Part 2

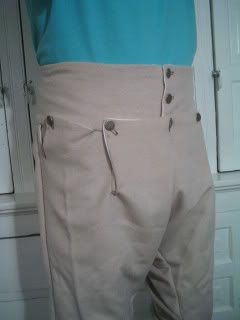
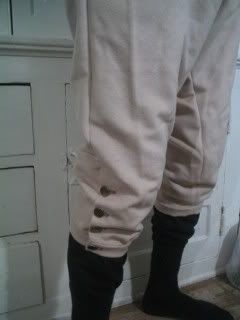
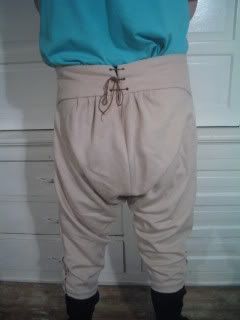
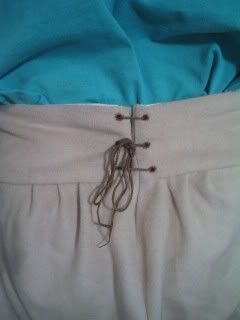
Finally, a completed pair of 1770 fall front breeches. I took my sweet time with these blasted things for a variety of reasons.


This is a pattern I've never worked with before, from a company that I've never used before. I'm a creature of habit & adjusting to a new pattern & a new company was a trial. I've heard good recommendations from others about the company but in all truth, I was less than impressed. From now on I'll be sticking with patterns that I choose, even if that means adding a pattern cost to orders.


There were several parts of this pattern that didn't "combine" well with my sewing personality. For starters, there were no finished measurements on the pattern and none of the on-line retailers that carry the pattern seemed to have measurements either. I'm not sure how W decided that this was the proper size for him without measurements. Another issue was that the pattern is given in more "words" than my visual brain could deal with. The instructions include steps such as "Seam from J to K"; "Match points D, E, H & J". I found myself constantly having to refer to the finished drawing; the only image included in the pattern but thankfully labeled to match these alphabetical points. My final complaint was the lack of actual historical information. The pattern only includes a list of other books, fine if you have easy access to those books or have read them before, less than helpful it you don't.


Add to that, the oddities of the fabric. This was suposed 100% wool from my stash. Although on further examination, it might be a blend after all. The material has a nice nap to it. I took my time making sure that the nap laid in the proper direction on each piece. It was extra work, but the finished product is nice & smooth.


The final stall was all the hand sewing. They are sewn with my usual hybrid method of machine foundation with hand finishing. The most labor intensive part was the buttonholes. I am still refining my hand buttonhole stitching. The individual stitches need to get closer together for starters. Yet when I do manage to get the stitches tightly next to each other, I have more trouble keeping their size consistent. Thankfully I'll get plenty of practice when I get to the finishing stages of the great coat. I also decided not to do any top stitching on these, as they will not be a washable item thanks to the wool and the inner and lining laid together neatly enough without the extra sewing.


Please pardon the modeling photos. J is a reluctant model but I insisted. These breeches do very little for the male figure, and even less on a hanger. I did cheat a little in the name of getting flattering photos. What you don't see is the nearly 2" extra gap in the waist that I pinned up so that they weren't falling down at J's feet. Although he has already laid claim to them if W changes his mind.

Labels: ,