Baby Got Back
or the modestly endowed ladies guide to enhancing her god given assets with a false rump.
Step 1: Collect you supplies
Sheet of tin foil, unused please.
Fabric. In this case, left over 6oz linen from lining the Hunting Coat
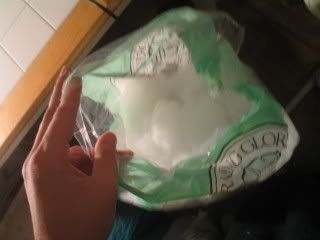
Stuffing. Lots & lots of stuffing.
Sewing thread. In this case, linen of course.
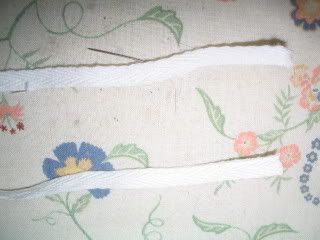
2 Waist Tapes. Enough to go around your waist and tie in the front. I ended up using slightly narrower than normal cotton tape since I seem to have run out of my standard 1/2" wide linen tape (again)
Step 2: The Tin Foil Form
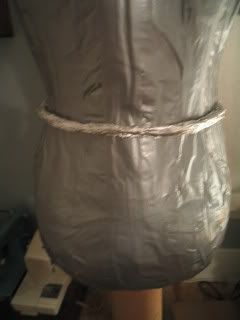
Form the tin foil into a long snake. Using your duct tape dummy, or yourself, bend the tin foil in a curve around your waist, just above you're "assets".
Step 3: The Pattern
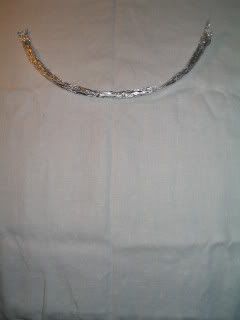
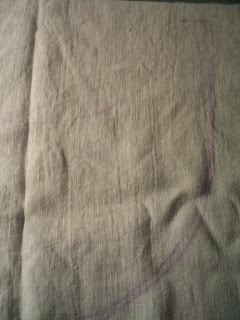
Carefully remove the tin foil pattern. Laying it on your 1/4 folded fabric. Trace the curve and sketch a similar lower curve to create the kidney shaped rump.
Step 4: The Cutting
Cut out the pattern, remembering to leave extra for seam allowance. Be sure to get 2 full kidney shapes, one for the top and one for the bottom of the rump.
Step 5: The Sewing
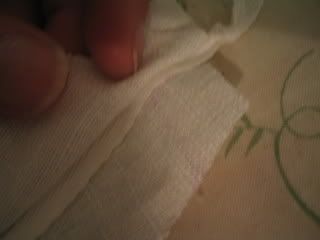
Leave both pieces together if they were cut together, or lay one piece on top of the other. Tuck one end of each waist tape between the layers at the point of the kidney shape. Start from slightly off center in the inner curve and sew around the shape until you reach a similar point on the opposite of the inner curve. Don't forget to leave an opening for turning & stuffing.
Step 6: The Flip & The Stuff
Flip the fabric right side out. Press if you are feeling particular. If not, begin stuffing. Start with the narrowest areas and stuff in small clumps until your rump feels nice & firm, like a strangely shaped pillow.
Step 7: Close It Up
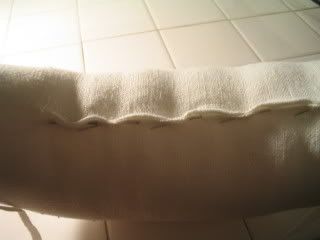
Pin the opening and carefully hand sew (blind or whip stitch works well) the opening closed.
Step 8: My Rumps
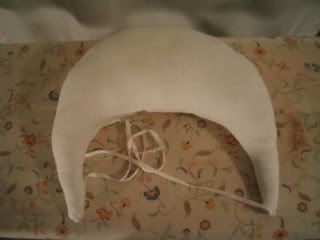
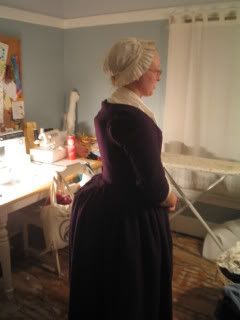
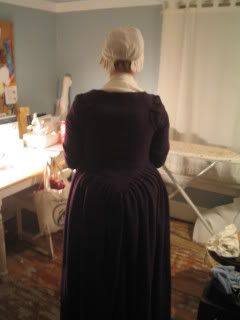
Tie the rump underneith your outer petticoat. The extra padding tends to make the back side of the skirt higher. If you intend to wear a rump with a particular petticoat or gown on a regular basis, make the rear panel longer to compensate for the added size. Alternately, wait to hem your gown until wearing the rump to ensure proper length all around.
Step 9: The Jokes
Proceed to make as many jokes about "rumps" "back" "ass" etc while wearing what amounts to an 18th century travel pillow on your backside. Marvel at a time period where even JLo would need extra padding to pull off a fashionable silhouette.
**Seriously, apologies to my more sensitive readers for the butt jokes. J threatened to send them in as comments if I didn't title the post after his favorite Sir-Mix-A-Lot song. And honestly when you're hopped up on Halloween candy & sewing a false rump at midnight, everything is funny**
Step 1: Collect you supplies
Sheet of tin foil, unused please.
Fabric. In this case, left over 6oz linen from lining the Hunting Coat

Stuffing. Lots & lots of stuffing.
Sewing thread. In this case, linen of course.

2 Waist Tapes. Enough to go around your waist and tie in the front. I ended up using slightly narrower than normal cotton tape since I seem to have run out of my standard 1/2" wide linen tape (again)
Step 2: The Tin Foil Form

Form the tin foil into a long snake. Using your duct tape dummy, or yourself, bend the tin foil in a curve around your waist, just above you're "assets".
Step 3: The Pattern

Carefully remove the tin foil pattern. Laying it on your 1/4 folded fabric. Trace the curve and sketch a similar lower curve to create the kidney shaped rump.

Step 4: The Cutting
Cut out the pattern, remembering to leave extra for seam allowance. Be sure to get 2 full kidney shapes, one for the top and one for the bottom of the rump.
Step 5: The Sewing

Leave both pieces together if they were cut together, or lay one piece on top of the other. Tuck one end of each waist tape between the layers at the point of the kidney shape. Start from slightly off center in the inner curve and sew around the shape until you reach a similar point on the opposite of the inner curve. Don't forget to leave an opening for turning & stuffing.
Step 6: The Flip & The Stuff
Flip the fabric right side out. Press if you are feeling particular. If not, begin stuffing. Start with the narrowest areas and stuff in small clumps until your rump feels nice & firm, like a strangely shaped pillow.
Step 7: Close It Up

Pin the opening and carefully hand sew (blind or whip stitch works well) the opening closed.
Step 8: My Rumps

Tie the rump underneith your outer petticoat. The extra padding tends to make the back side of the skirt higher. If you intend to wear a rump with a particular petticoat or gown on a regular basis, make the rear panel longer to compensate for the added size. Alternately, wait to hem your gown until wearing the rump to ensure proper length all around.


Step 9: The Jokes
Proceed to make as many jokes about "rumps" "back" "ass" etc while wearing what amounts to an 18th century travel pillow on your backside. Marvel at a time period where even JLo would need extra padding to pull off a fashionable silhouette.
**Seriously, apologies to my more sensitive readers for the butt jokes. J threatened to send them in as comments if I didn't title the post after his favorite Sir-Mix-A-Lot song. And honestly when you're hopped up on Halloween candy & sewing a false rump at midnight, everything is funny**
Labels: 18th Century, Accessories, Tutorials, Women

0 Comments:
Post a Comment
<< Home