Slightly Obsessed

A long standing living history blog covering all eras with a special focus on clothing, food & social culture as well as first-person reenacting.

Name:
Location: Barrington, 2c79a7d7-8d84-e411-95ca-d4ae52b58f15, United States

Tuesday, November 28, 2006

If the shoe fits Part 1

I ordered my shoes today.

I ended up going with the Concord's from Fugawee. I seriously love the Anna but they are too pretty for men's wear. Then there was the Debbie, that is based off the Hogarth etchings but those are also a little girly and more expensive than I have right now for shoes (someday though).

I was really torn and almost got the Barbra which is the woman's sized version of the 1758, except the name should tip you off. They are a straight last, which I really really like but don't have a very big tongue. Honestly they look too much like modern shoes with a buckle where the larger tongue is a little more correct.

Of course we can't get perfectly correct GAoP shoes & I've driven myself nuts deciding which to get. But I finally did it. They should be here by next week.

For a girl that doesn't like shoes, I'm pretty excited.

Labels: ,

Saturday, November 25, 2006

Order Up

Made several purchase for the woman's kit today.
From Joann's

linen for cap, pockets & the lowest layer of petticoats
20 yards of pattern ease for making adjustments from the muslins


Mantua Pattern
Stays pattern
Emotional support & encouragement ;)


linen for stays & petticoats

I went with the mustard color for one set of petticoats and the red for the nicer petticoat and stomacher set. For the stays I went with the darker tan color. Plus I threw in a bit of nice linen for a shift and the inner layers for the stays.


wool for mantua
Choose the cocoa brown wool gab for the mantua. It's good and universal and I am one of the few people who does actually look good in brown, so why not go with it. Used a 15% off coupon, yeah!
Monday I will order the shoes & the supplies from Wooded Hamlet since both of those have to be made over the phone.

Labels:

Hello, my name is "Sticky"

Over the Thanksgiving holiday I finished the duct-tap fitters model project. WOW! this is something that every person planning to do any amount of sewing for themselves should do. It's probibly also a project every art student should do. So much fun I'd almost volunteer to do it again.

Here is how to make your own
Duct-Tape Double
(the condensed version of course)

Gather your supplies


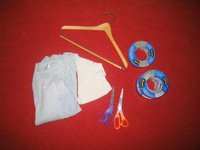
-1 more roll of duct tape than you think you'll need. I'm about a size 8 & used 1 1/2 rolls total, only about 1 roll for the body and the rest for finishing.

-sizzors. My worn out fabric sizzors worked great.

-oversized t-shirt that you don't care about

-the sleeve off another t-shirt for a make-shift turtleneck

-Black Sharpey marker

-yard stick

-At least 1 helper. Someone who you trust with duct tape, sizzors & who you won't mind having touch you in some pretty personal places. In my case I had 4 "helpers". My Mom did the taping, My Omi sat on the couch and kept me talking, My Partner took terrible pictures for black mail later & my Daughter fell asleep on the couch (big bonus!)

The basic steps:

Start by putting on the oversized t-shirt. We taped it under my crouch to keep it from riding up while we taped. Take the extra sleeve and wrap it around your neck in a mock turtleneck fashion. Use duct tape to hold it in place. This is where it's very important to have your hair tied back. I had several little hairs catch in the duct tape and it's not pleasant.

Start the first layer of tape under your bust, wrapping horizontally down to at least 3" past the widest part of your hip. You'll need that extra distance later when finishing, trust me. Use rather long strips for this being sure not to pull the tape tight enough to "smoosh" in any of your rounder parts. This is where you get to find out how much you've been slacking on doing those daily sit ups! Oi!

For the bust area use mid length strips to create a cross your heart pattern over one breast, through the center & under the other side. This was particularly hard for us thanks to my larger bust. I don't think we got nearly as much space between breasts as I actually have but since most shirts form a line over the bust, I don't think it's going to be a problem.

Once the cross your heart section is done continue to wrap a few layers in that same pattern to create the shape of the bust. We had to fiddle with strip length and placement a lot here to maintain the right curve.

For the shoulders we did one layer around the upper arm at this point and added shorter strips radiating out from the neck with the second layer.

Once you are all covered in one layer of Duct tape, it's time for the second layer. This time vertically. We found that for the front, in order not to loose the curves (which I have plenty of apparently) it was easier to use slightly shorter strips of tape. we started by covering the bust down and then moved to the bust and finally the shoulders.

Before removal measure a consistant distance from the ground to your hip, marking with the Sharpey. We measured 31" inches. This is a leveling point especailly helpful if one hip is higher than the other & for later finishing. Also mark the waistline (bend a little and it will show), the center & underneith each bust.

Now you're ready for the removal! Have your trusted helper slip their hand up the center back of the tape layers, cutting carefully along your back until the form is completely split in two. This is where that trust thing comes in handy! Once the form is split, slip yourself out of it and get ready to finish it off.

Finishing

Gather your supplies:

-the rest of your duct tape

-every plastic shopping bag for at least 3 households. Start collecting and asking your friends and family now, you will need a lot!

-cheap christmas tree stand from Good Will

-cardboard carpet tube

-wooden hanger

-shoulder pads

-discarded cardboard box

-sizzors

-Stick for getting plastic bags in those tight places

Start by padding out the shoulders of the wooden hanger with shoulder pads, plastic bags & duct tape. It helps to have your helper hold the hanger up against your real shoulders to get the curve as close to matching as possible. Keep tweeking it till it's perfect.

Cut your cardboard tube to the length from your shoulders to the ground. Cut 2 slits in it on either side to hold the bar of the hanger.

At this point it's easiest to cut a random round of cardboard, slightly bigger than your hips. This will form the bottom of the model and keep all the bags from falling out. Cut a hole for the cardboard tub in the cardboard base, slipping it over the tube and leaving it to sit at the base until it's needed.

Now stand the tub up in the christmas tree base and slip the hanger into the slits you cut earlier. use duct tape to secure the hanger to the base making sure to match the slope of your shoulders as closely as possible.

Now comes the real fun. Put the duct tape model over the hanger. Adjust it so that it hangs well in the shoulders. Use more duct tape to secure the model to the hanger. We found going through the arm holes helped a lot here.

Now you are ready to begin stuffing. We taped up the entire back opening before stuffing, but this made it very hard to stuff the upper back because of my small waist. There wasn't enough room between the stand and the form for our hands. It might be easier to tape only from the waist up first, Stuff that area and then close up the lower portion of the split.

We also found a few tricks while working with the bags. It's easier to stuff them individually for most areas. For the wider section across my hips and stomach we laid several bags together in a larger bag, creating a sort of pillow that wrapped around the stand. We also found that after a certain point, the bags would fall out the bottom every time we added new ones to a different area. We ended up creating non sticky "slings" by making a long strip of tape with another strip over lapped in the middle and taping them across the bottom of the form. This helped keep the bags from falling out while we worked on the more open areas at the bottom of the form.

While stuffing stop to take measurements on occassion, adding or removing bags as needed to get as close to your actual measurements as possible. This is where that helper really comes in handy again. My mother frequently had me stand next to the model and would eye ball use together to see if the shape was correct.

Once the majority of the form is stuffed slip the cordboard round up to your hip level. With the sharpy marker trace the conture of your hip onto the cardboard then cut out. Remove the tape "slings" if you've used them at this point, the cardboard will take their place. Stretching the tape just slightly, fit the cardboard round into the bottom of the form. This is where those extra inches taped at the bottom help. Fold the extra inches around the cardboard, using more tape to secure it. Before taping the last of the base, make sure that the very bottom is stuffed fully, adding more bags as needed.

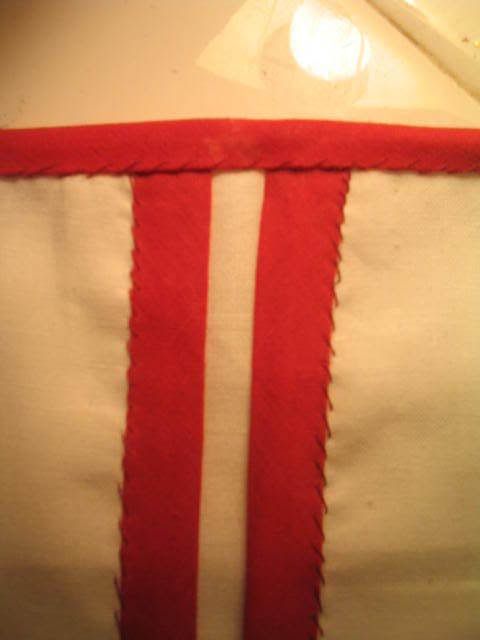
Step back and marvel at your Duct Tape Double!
(these are terrible photos. I'm not really that lopsided although one breast is higher than the other, a fact I hadn't realized until seeing myself in silver.)

Now go do some sewing!

Labels:

Sunday, November 19, 2006

Cost Estamates for Woman's kit

I've begun pricing out the parts to the woman's kit to see how much I have to scrounge for to get started on this project.


Chemise fabric ~~30
Chemise pattern~~Free!
Chemise notions~~6
Stays pattern~~25
Stays Fabric~~25
Stays notions~~20
Boning~~15
Mantua pattern~~30
Mantua fabric~~100
Mantua notions~~20
Stockings~~12
Straw Hat~~6
Linen cap~~6
Shoes~~98
Buckles~~30
Basket~~Free!
Apron~~ 10
Mug~~15

Total estamate~~heart attack inducing!~~448

The manuta fabric includes 2 petticoats & a stomacher. The notions include things like silk thread, pins and linen tape. The patterns are terriblely expensive but I know the Empress is worth it & the pieces will be approved because of her patterns being used. The boning is reed, all the fabrics either 100% linen or wool, even the inner lining on the stays is linen. Plus I can justify that some of the pieces like the shoes will be worn for both kits.

However, at this point I don't have that kind of cash laying around. I am able to get started with the stays and the shoes for now. Two of the big parts that can't really be "borrowed" from someone else (not that I know anyone to borrow from!). Everything else is going to have to wait until the money tree starts fruiting!

Labels: ,

Monday, November 13, 2006

A Banner Mail Day

The last of my fabric samples arrived today so I can begin choosing the fabrics and colors.

Main body of the mantua will be wool gab from Fabric.com
Bodies will be linen from Fabric-Store.com
Peticoats and chemise will also be Fabric-stores 5oz linen
Bodies will have linen taped edges from Wooden Hamlet
My brass pins & maybe a few other bits & pieces will also come from them as well.
Now to just choose the colors! And get the money to actually get started.

With the main body in tan. Bodies in ginger. Petticoat choices are: red, gold, green. blue, chocolate brown (I will also have an underlayer in white linen if needed.)

With the main body in chocolate brown, bodies still in ginger. Petticoat colors are the same as above

Of course the chocolate brown with chocolate brown doesn't work. And the greens I photographed are different. I'm leaning towards the Dark brown with the gold with the red as a back up "fancy" version.

In other news I got my quills today. Just need to sit down & cut them & start writing away.

Labels: ,

Friday, November 10, 2006

What Wool'd Ye Do

The Empress, in her coniving way, has convinced me to make my first Mantua out of wool rather than the lined linen I was thinking of. In a way this is good.

Wool wouldn't need to be lined. One less step and that much less fabric.

However unlined means I will have to do different seams, grumble.

On the third hand, wool is also better for winter events, generally warmer but also still breaths well enough for most summer events. Considering the crazy weather we have here I might still need a linen mantua for July but wool sounds so much more comfortable for October - May.

On the 4th hand, wool is generally more expensive than the linen and there are significantly more weaves of wool to choose from. That's where fabric shopping online gets hard. I like to touch fabric. o I'm currently deciding between wool crepe & wool gab. Already I think the wool flannel is to, puffy, drapeless, soft for what I'm imagining. I have samples on order from http://www.fabric.com so we'll see what their wool is like.

Again I've been thinking of colors. I really like the piece of advice to have all your pieces in the same general colo combo. That way they can interchange easily. I'm leaning towards chocolate brown with the gold & orange like my Ren. faire garb.

However I'd also like to add some green. "Jane" has a green mantua, it's her only piece of clothes outside of the sailor's work clothing. So being the silly person I am, I would also like a green mantua. Perhaps that will be the one in linen. Green seems to be a very hard color to find the "right" shade of. Green with mustard looks good and the right green looks good with brown as well.

While I'm at it in the fabric department. I've been thinking of a red silk dress eventually. And a mustard colored justacourps with matching breeches. Those are distant projects though.

Labels: , ,

Thursday, November 09, 2006

Awl's well

I bid on a nice wooden sewing awl today.

I figure if I'm going to have to hand bind the eyelet holes on my stays I might as well do it with a nice tool. Nice tapered wooden awls are really hard to find. Seems everyone wants to use metal these days. Of course I *have* to have a wooden one so that I can keep it in my kit after I've done all that work! Will post a pic when it gets here.

Labels:

Tuesday, November 07, 2006

A pocket full of happiness Part 1

In the tradition of "when I'm feeling depressed I sewing something", I made myself a pocket today.

The Empress had it on her top 10 list & honestly I always forget pouches & pockets until the last & then am never happy with them. Not this time.

Totally NOT period fabrics. Just white muslin & bias tape from the scrap bin. It's not like anyone will be seeing it though. When I've got some bigger natural fabric scraps I'll make a replacement. This was super quick, even with the hand sewing.

I as going to do an embroderiered "J" on it but the only floss I have is brown. It works though & will hold stuff under my skirts which is all that matters. You can still see the chalk marks that I haven't washed off yet.

and a close up of the whip stitching. Not my best but good practice for when it matters.

Labels: , ,

Monday, November 06, 2006

The grand plans for RF2

Here is a quick update on my plans to complete before RF2.

To make:
duct tape fitters model

To purchase:
fugawee shoes
more stockings
red knitted monmouth cap
wig
(hats?)

men's kit pieces to sew:
slops out of linen canvas
linen shirt
tan striped linen waistcoat
grey wool common man's jacket
sailors sack of some kind

woman's kit to sew:
linen stays (with pink silk trim?)
green & brown linen manuta
golden yellow linen petticoats

As you can see, there is a lot to do and only 11 weeks to do it in. Add to that having to wait until my next "allowance" comes in and there is a lot of time pressure. The grey coat may have to wait. I am going to focus on the woman's kit most because I want that for the ball night, even though it's not a fancy outfit or anything.

Labels:

Yes, I'm Slightly Obsessed with GAoP reenacting

For those that have been following me on My Space, you'll say "Slightly?".

Well not really. The previous 3 months I have been "minorly" obsessed. I have now passed into "slightly", to be followed by "extremely" and finally "hopelessly". Come to think of it, there might be another stage after "hopelessly" but we'll cross that bridge later.

So to mark the beginings of Slightly Obsessed I'm starting this blog to cronicle my obsession.

Stay tuned for updates on my preparations for Reenactor Fest 2 in Feb 2007.