Slightly Obsessed

A long standing living history blog covering all eras with a special focus on clothing, food & social culture as well as first-person reenacting.

Name:
Location: Barrington, 2c79a7d7-8d84-e411-95ca-d4ae52b58f15, United States

Wednesday, October 31, 2007

Baby Got Back

or the modestly endowed ladies guide to enhancing her god given assets with a false rump.

Step 1: Collect you supplies

Sheet of tin foil, unused please.
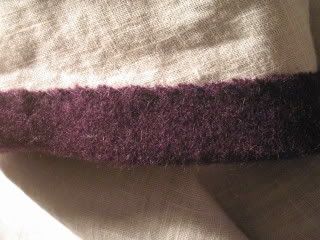
Fabric. In this case, left over 6oz linen from lining the Hunting Coat

Photo Sharing and Video Hosting at Photobucket

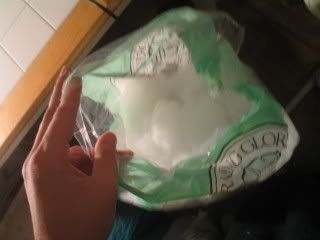
Stuffing. Lots & lots of stuffing.
Sewing thread. In this case, linen of course.

Photo Sharing and Video Hosting at Photobucket

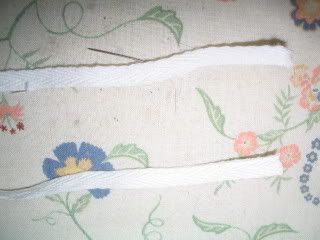
2 Waist Tapes. Enough to go around your waist and tie in the front. I ended up using slightly narrower than normal cotton tape since I seem to have run out of my standard 1/2" wide linen tape (again)

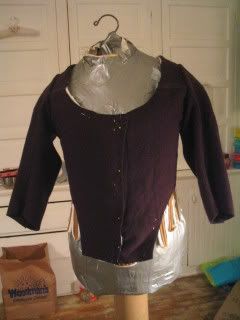
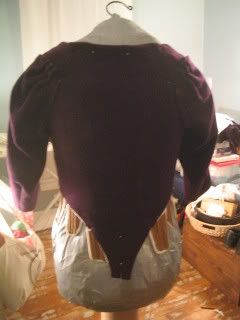
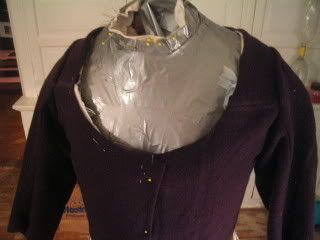
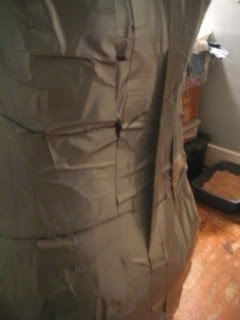
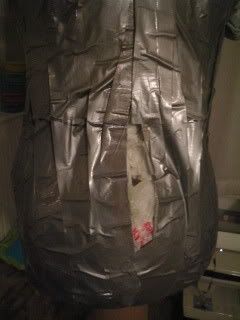
Step 2: The Tin Foil Form

Photo Sharing and Video Hosting at Photobucket

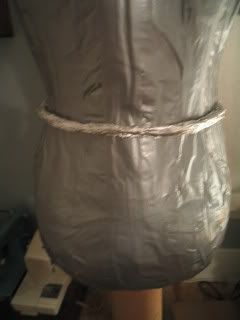
Form the tin foil into a long snake. Using your duct tape dummy, or yourself, bend the tin foil in a curve around your waist, just above you're "assets".
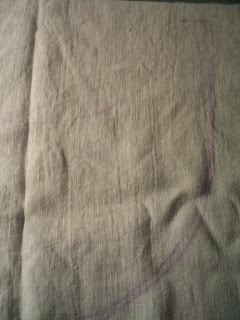
Step 3: The Pattern

Photo Sharing and Video Hosting at Photobucket

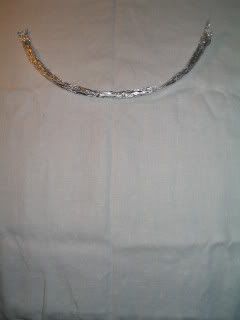
Carefully remove the tin foil pattern. Laying it on your 1/4 folded fabric. Trace the curve and sketch a similar lower curve to create the kidney shaped rump.
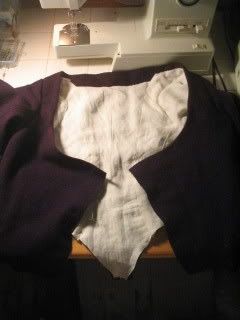
Photo Sharing and Video Hosting at Photobucket

Step 4: The Cutting

Cut out the pattern, remembering to leave extra for seam allowance. Be sure to get 2 full kidney shapes, one for the top and one for the bottom of the rump.

Step 5: The Sewing

Photo Sharing and Video Hosting at Photobucket

Leave both pieces together if they were cut together, or lay one piece on top of the other. Tuck one end of each waist tape between the layers at the point of the kidney shape. Start from slightly off center in the inner curve and sew around the shape until you reach a similar point on the opposite of the inner curve. Don't forget to leave an opening for turning & stuffing.

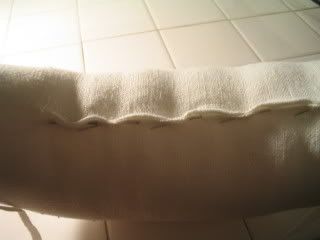
Step 6: The Flip & The Stuff

Flip the fabric right side out. Press if you are feeling particular. If not, begin stuffing. Start with the narrowest areas and stuff in small clumps until your rump feels nice & firm, like a strangely shaped pillow.
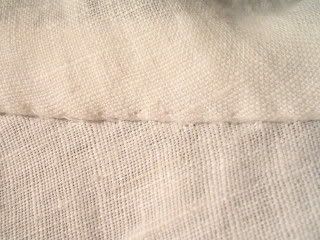
Step 7: Close It Up

Photo Sharing and Video Hosting at Photobucket

Pin the opening and carefully hand sew (blind or whip stitch works well) the opening closed.
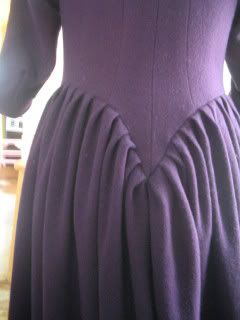
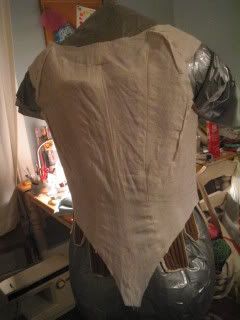
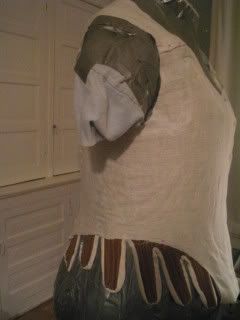
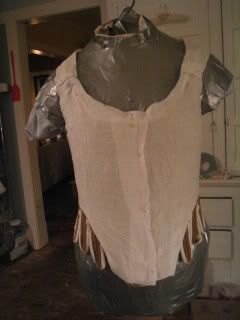
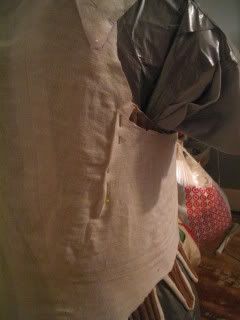
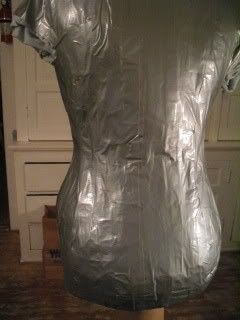
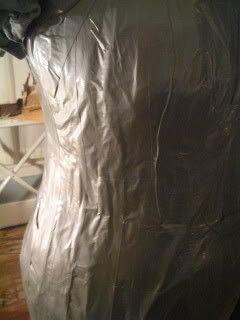
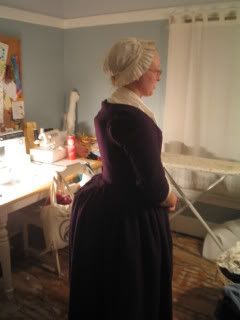
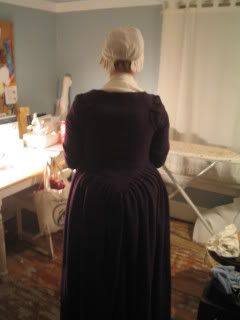
Step 8: My Rumps

Photo Sharing and Video Hosting at Photobucket

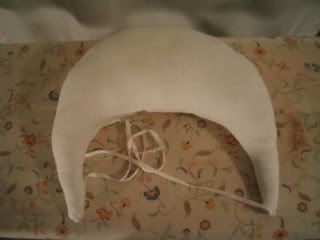
Tie the rump underneith your outer petticoat. The extra padding tends to make the back side of the skirt higher. If you intend to wear a rump with a particular petticoat or gown on a regular basis, make the rear panel longer to compensate for the added size. Alternately, wait to hem your gown until wearing the rump to ensure proper length all around.

Photo Sharing and Video Hosting at Photobucket

Photo Sharing and Video Hosting at Photobucket

Step 9: The Jokes

Proceed to make as many jokes about "rumps" "back" "ass" etc while wearing what amounts to an 18th century travel pillow on your backside. Marvel at a time period where even JLo would need extra padding to pull off a fashionable silhouette.

**Seriously, apologies to my more sensitive readers for the butt jokes. J threatened to send them in as comments if I didn't title the post after his favorite Sir-Mix-A-Lot song. And honestly when you're hopped up on Halloween candy & sewing a false rump at midnight, everything is funny**

Labels: , , ,

Sunday, October 28, 2007

Historical Halloween 2007

Since I was already working on the 4 day Polonaise Project for the Colonial Ball next weekend, I took advantage of Halloween to do a trial run of the gown.

Photo Sharing and Video Hosting at Photobucket

I very quickly "polonaised" the gown by gathering up the back in two places and stitching the gathers with a sturdy linen thread; the same I used to make the green lucet cord I tie my stays with. This isn't a perminant solution, just something so that I didn't have to worry about evening out the hem while in a rush to get to a Halloween party. I plan on evening the hem in the coming week and possibly wearing the skirt down for the ball with a false rump underneith instead.

Photo Sharing and Video Hosting at Photobucket

I wore my standard other clothes, brown fully boned stays, regular shift, white petticoat, lavender cotton stocking and buckle shoes. I left off the neckerchief & did "spoobs" instead (this was Halloween at the bar after all). The fake wig that I purchased turned out to be mispackaged, so I wore my pleated cap & straw hat instead. I also found some white face powder and played up the 18th century "white face" look with that & some red lipstick. In the photos you can almost see the velvet beauty patch I made in the shape of a dancer, the simple choker of white fake pearls and the guillotine gash that J painted for me.

Photo Sharing and Video Hosting at Photobucket

Unfortunately no one at the bar "got" the costume. I thought for once it would be semi clear, but again people asked if I was Amish. Yeah, when was the last time you saw an Amish woman with cleavage. Idiots. But at least I know the gown fits & is comfortable. I'm looking forward to the ball next weekend and being around people who will appreciate the work I put in.

Labels: , , ,

Day 4: Polonaise

The final day in the 4 day Polonaise Project!

The night before the skirt had been roughly pleated and attached to the bodice. Today's tasks consisted of refining the pleats and attaching the skirt to the bodice. Luckily I had plenty of cat help from Barley Mow

Photo Sharing and Video Hosting at Photobucket

To start I based the pleats in place to eliminate shifting as the bodice & skirt came together. Next I finished the top 4 inches of the front facing with a 1" wide doubled hem, whip stitched closed. Next I worked from the front to as close to the center dip as I could. The skirt starts about 4" from the center of my hip, right at about the same place that my petticoats overlap. This is flattering, leaves enough that I can still get into my pockets and leaves enough of the front V as well.

I also left about 2" extra on either side of the very bottom of the bodice V for a final inset box pleat. This wasn't 100% intentional but it was easier to leave the pleat until the rest of the skirt was attached. Then the center back pleat is set in by hand, the extra fabric whip stitched in line with the other pleats to keep everything tidy.

Photo Sharing and Video Hosting at Photobucket

For the front bottom of the bodice, I folded the seam allowance for both the lining & the outer in on each other and whip stitched them in place with the smallest stitches I could stand.

Finally I folded the front facing of the bodice over and whip stitched it into place. The original pattern suggests using hook and eyes along the center front but I nixed that idea. To begin with, I like the adjustability of pinning my bodice closed. Second it eliminated needing to make the bodice front "straight" or in my case, not straight. I found when I pin the front the top over laps significantly more than bottom. Closing with hook and eyes would mean I have to make the front edge just match. Entirely too much work in my mind when I could just let it over lap how ever it needs too and pin in place.

The final gown on Sticky, with my green wool petticoat & a simple silk neckerchief (& J's straw tricorn where I hide all the feathers out of cat reach)

Photo Sharing and Video Hosting at Photobucket

Labels: , ,

Day 3: Polonaise

Day three wasn't a highly productive day in the four day polonaise project.

The sleeve outers had already been mocked up and roughly set into the arm scye. All that had to be done was sew them in place for the long term. To do this I followed the same technique I had learned while doing the sleeves on the Hunting Frock/Riding Habit.

First, I caught the outer & lining along the bodice side of the arm scye while setting in the sleeve. Next I attached the sleeve liner to the cuff edge of the sleeve. The lining is pulled up and whip stitched over the bodice to sleeve seam, leaving a nice, covered interior.

Photo Sharing and Video Hosting at Photobucket

Just like at the neckline, I folded the wool outer over the linen liner at the sleeve cuffs and whip stitched the outer in place. I prefer this finish and like that it provides a nice stable spot to baste later sleeve ruffles without wearing on the lighter linen lining.

The semi finished bodice. The only unfinished seams are along the bottom edge where the skirt will be attached and along the front center. I'm saving the front center seam for last so that it's as neat & tidy as possible.

Photo Sharing and Video Hosting at Photobucket

After the sleeves where set in & the lining completed I still had some sewing energy, so I got a head start on the skirts. I sewed the two skirt panels together along the back center and roughly pleated the skirt in place. I left plentiful amounts of fabric at the front opening, both for the facing and because the wool didn't pleat as tightly as a lighter fabric would have. Frankly there was just more in the skirt piece than was needed. Still not enough to have made a round gown out of the scraps though.

Labels: , ,

Day 2: Polonaise

Day two of the four day polonaise project was spent laying out the outer wool, getting up the nerve to cut into it and fitting it over the lining.

Fitting the outer follows the same steps as fitting the lining, only now the goal is to line up the outer and lining as much as possible. Pins, pins and more pins are essential in this process. I sometimes call it "sewing with pins".

Photo Sharing and Video Hosting at Photobucket

Photo Sharing and Video Hosting at Photobucket

Photo Sharing and Video Hosting at Photobucket

By the end of the evening I had also sewn the sleeves together and was roughly fitting them into the arm scye. Note the nice little pleats on the back of the shoulder being held together with pins.

I also turned under the seam allowance around the neckline and whip stitched it in place. I'm amazed at how nice my hand sewing has become in just under a year. I used to sew with these big Frankenstein stitches, and now they are actually neat and even enough that I want to show them off.

Photo Sharing and Video Hosting at Photobucket

At this point in the project I had stopped following the directions that came with the pattern (naturally). I ended up relying on the techniques I learned in other projects and finished interior photos I've seen on-line.

While I could have turned under both the lining and the outer around the neck and done something like machine top stitching and/or prickstitching, I prefer the wool covering the linen. The flannel doesn't fray and will wear better around the neck. While in the end removing the lining for replacement will mean completely dismantling the bodice, I think the long term benefit of having a more sturdy edge will out weigh the possible non-historically based construction.

Labels: , ,

Day 1: Polonaise

Day one of the 4 day Polonaise Gown project was spent cutting and fitting the lining. Not much exciting to report really. I dressed Sticky in my stays but left off the other undergarments since they were still in the laundry from last weekends event.

The process is fairly self explanitory.

To start I cut the pattern template at the "shorten or lengthen here" line. I know from experience that I have a short torso and will need to shorten the body. I laid the top half of the back pattern piece where I wanted the top of the gown to be (in line with the top of my stays). Next I laid the bottom half where I wanted the bottom to end, also in line with my stays. The resulting 2" overlap is taped & the same measurements done with the front pattern piece. The finished pattern is used to cut the liner & outer bodice.

The first sewing step is to stitch the center back seam. Then the front/side piece is fit around to the back sides. Concave to convex curves are met & adjusted as needed. I took off a bit more around the armpits and across both the back neckline & the front neckline. Even with the adjustments to the torso length both were higher than I wanted them.

Photo Sharing and Video Hosting at Photobucket

Photo Sharing and Video Hosting at Photobucket

Photo Sharing and Video Hosting at Photobucket

In the fitting around I had to take a small tuck near the back of the armpit to keep the lining snug. I was a little worried that I would have to do a similar tuck in the outer in order to get a snug fit. Part of me didn't want to sew the tuck in the liner but in the end I bit the bullet and went with it, choosing to worry about the outer when I got to that point.

Photo Sharing and Video Hosting at Photobucket

After the entire thing was sewn & pinned together in the front I took my amazing fancy iron to it. With the help of the upright steam setting I got the linen lining nice and smooth & snug around Sticky and my stays.

Labels: , ,

Surgery for Sticky

Before getting started on the Polonaise gown I had to do a bit of surgery on Sticky.

Sometime during the summer she had started coming "unstuck". Not a good thing for a duct tape double. Specific trouble spots were right around the hip & the back center seam. The back seam was so bad that you could actually see the plastic bags that she is stuffed with.

Photo Sharing and Video Hosting at Photobucket

Photo Sharing and Video Hosting at Photobucket

Armed with a fresh roll of 3" wide, industrial strength duct tape, surgery began. I think part of the reason Sticky didn't hold up as well as I had hoped was because we only used 2 layers of tape rather than three. I also think that humidity played its part in unsticking the layers. I also have to remember that she is getting smooshed a lot more than an average duct tape double. After all, I'm cramming her into my fully boned stays and she doesn't have the benefit of having bones underneith to stand up to the compression like my actual body does.

Photo Sharing and Video Hosting at Photobucket

Photo Sharing and Video Hosting at Photobucket

Labels: ,

Wednesday, October 24, 2007

Ch-ch-ch-ch-changes

I had grand plans for this purple 1750's era round gown out of the $5/yard wool I bought last spring. Unfortunatly, I don't have enough to do either the en forreau pleating or the apron front. I'm seriously bummed about this and am already planning on another just so I can do a proper round gown. Although this one might be out of linen so it's more wearable at later season (ie, super hot midwest summer) events.

Instead I do have enough material to make a later period polonaise. They aren't my favorite style of gown. They are also entirely too common in my mind. I never see round gowns but it seems everyone has a polonaise.

What can I do though, I can't get more fabric & I only have enough to cut either the apron front and 1 side of the back or do the separate back pieces and no apron front & have enough for both sides of the back skirt. Piecing isn't an option as I'm already using a random piece for the sleeves & shoulders.

Oi!

The thing is I did purchase enough fabric, 6 yards & the instructions say you only need 5.5. Well that doesn't take into account how terribly the wool shrunk when being pretreated. It also doesn't take into account that the fabric was in two odd sized scraps to begin with. I guess thats what I get for buying super discounted wool. Affordable but you have to be creative with what you're making. Maybe I should have used the fabric to make the Mantua de lit or Mantellet after all.

Bummer.

The plus side is that I can wear one of my petticoats & it will be visible. Maybe the new green wool or the darker red. The yellow is pretty beaten up after a season of wear & although the red has holes, I don't think anyone will notice those tiny things.

Labels: , ,

Monday, October 01, 2007

Caps from Scraps

I love this new cap! I'm calling it Pretty in Pleats.

Photo Sharing and Video Hosting at Photobucket

This is the Louise design from La Fleur de Lyse. The pleats weren't as bad big of a hassle as I thought they would be. Maybe I've just gotten so used to knife pleats that I don't even notice them anymore. Measure, mark, fold, pin, press, tadahh.

Photo Sharing and Video Hosting at Photobucket

The pleats and the front band are made from the remainder of the linen/cotton blend I made my "clean apron" out of. I had to piece the pleated band in the center because the piece wasn't long enough to cut on the fold. It's hardly noticeable thanks to all those folds.

Photo Sharing and Video Hosting at Photobucket

The back pouch is made from a different scrap of 3oz linen left over from one of my ill fated attempts at a lappet cap. Most seams are machine sewn with 100/3 linen thread. It ties with 1/8" cotton twill tape that's threaded through a central eyelet hole, rather than the suggested 2 side buttonholes.

Photo Sharing and Video Hosting at Photobucket

The one thing I have to be careful about is tucking my hair up in the pouch. Normally when I wear the lappet cap, I wear my hair in as much of a bun as it will fit into. The pouch on this, despite being the same size as the lappet caps pouch, doesn't allow my hair to be in the same bun. So instead I had to tuck it up in there loose. I also have to be very careful to pin the sides & the center to keep it from pushing back to far on my brow and exposing the hair on top. I think with several bobby pins this will be very sturdy though.

J of course says it looks like a cupcake. Thanks. I think it's cute and will be wearing it proudly at Mississinewa this weekend.

Labels: , ,