Slightly Obsessed

A long standing living history blog covering all eras with a special focus on clothing, food & social culture as well as first-person reenacting.

Name:
Location: Barrington, 2c79a7d7-8d84-e411-95ca-d4ae52b58f15, United States

Thursday, April 16, 2015

Govern Well Thy Appetite, Part 1.

Or historic food and the modern diet.

For some people experimenting with historic recipes, exploring unique ingredients and testing batches of odd looking results is the fun part of living history. For others, especially those who follow restricted diets, it's hard enough to find something to eat in the modern world, much less a historic recipe. However, it's not actually as hard as it might seem at first to eat period correct foods while still sticking with your dietary needs.

For this mini-series of articles, I'm going to look at a few of the most common dietary restrictions, how to cope with them without sacrificing historical accuracy (too much) and a few favorite recipes that fit the bill. Every one of the recipes I suggest here has been tested, often times at an event, and is guaranteed to appease both those with special diets & the omnivores alike.

Vegetarian


Vegetarianism is pretty common in the 21st century but it isn't a new concept. Sure it might seem as though every meal & every dish contained some kind of meat. Some recipes seem like the cook was just trying to cram as many meats into one dish as possible. Thankfully, that's not really true. During the late 18th & early 19th century many enlightenment leaders adopted vegetarianism as part of their greater lifestyle. Writers such as Francois-marie Arouet (aka Voltaire), Percy Shelley & even Leo Tolstoy were all vegetarians. Additionally, many of the lower classes relied heavily on vegetables to fill out the meat supplies they simply couldn't afford.

Lettuce, Tacuinum Sanitatis, 1400.

One of my favorite historic vegetarian dishes to make is cooked greens. Alternately called buttered worts in the 16th century, sallat in the 17th century or simply greens, these are nothing more than spinach, collards, mustard greens, cabbage and any other leafy vegetable. Greens are some of the first vegetables available during the growing season & some of the last before the frost hits. They are ideal for year round events, fast to prepare & adaptable for a variety of time periods. The most basic preparation is simply cooking until soft & dressing with butter or oil, but other ingredients & spices are sometimes included depending on the tastes of the era & the whims of the cook.

Salad dish, c.1800-1810. Victoria & Albert Museum and Salad Bowl, 1728. The Met.
Sallets in general consist of certain Esculent Plants and Herbs, improv'd by Culture, Industry, and Art of the Gard'ner: Or as others say, they are a Composition of Edule Plants and Roots of several kinds, to be eaten Raw or Green, Blanch'd or Candied; simple, and per se, or intermingl'd with others according to the Season.

Acetaria: a discourse of sallets
John Evelyn, 1699

Lettuce Seller, Philippe de Tubieres. 1742. The Met 
A Boyled Sallet.
Take Spinage and boyle it and chop it, and when it is chopt, poure it in a little Pipkin, with Corance, sweete Butter, Vinagre, and Sugar, boyle them altogither, and when they are boyled put it in a dishe, and lay sippets round about, and strew suger upon them and serve them out.

Book of Cookery
A.W. 1591

Spinach
Be careful to pick it exceeding clean, then wash it in five or six waters. Put it into a saucepan that will just hold it without water. Throw a little salt over it and cover it close. Put your saucepan on a clear quick fire and when you find the spinach shrunk and fallen to the bottom and the liquor that comes out boils up, it is done Then put it into a clean sieve to drain and just give it a gentle squeeze. Lay it on a plate and send it to table with melted butter in a boat.

The Housekeeper's Instructor, Or, Universal Family Cook
William Augustus Henderson, 1805


Part 2: Dairy-Free & Vegan (Coming Soon)

Labels: , , , ,

Friday, March 14, 2008

Nose to the Grindstone

Another interesting artifact found in a random search. This does seem consistent with what I've been reading about coffee procedure & tools in the 18th Century.
dutchmill2.jpg
18th century Dutch coffee mill in brass, wood, forged iron and brass
inlay with removabe handle, most probably replaced at some point in time.  Excellent condition with small tear in brass
body  height 6 1/2"
 blog it

Labels: , ,

Monday, July 23, 2007

basic petticoat instructions

Sharing these basic instructions since I've been asked a few times & this should save me the extra typing. These instructions make an average sized petticoat suitable for many historical periods. I have worn mine for everything from the 15th through 19th centuries, and yes, even sometimes in my modern life.

------

Materials:
2 yards of 60" wide fabric
3 yards or more 1/2" wide linen or silk tape

To make a basic petticoat:

1. Cut your material into 2, 1 yard pieces; one for the front panel, one for the back.

2. Turn the fabric so that you are pleating along the 60" side. This leaves you with a 36" long skirt, more than generous enough for most applications.

3. Knife pleat 1 panel of your fabric. See "Taking a Stab at Knife Pleating" for detail instructions.

4. Sew the pleats in place, right at the very top or the panel.

5. Repeat for your other panel.

6. Lay both panels right sides together (like the skirt is inside out).

7. Measure ~9" down from the top edge, where your pleats are.

8. Sew from the bottom edge of the panels to that 9" mark. The remaining space will act as your pocket hole.

9. Measure a piece of linen tape long enough to go around your waist & tie in back easily. Cut 2 of these, one for each side.

10. Line the center of the tape up with the center of the front panels. Lay the remainder of the tape along the panel's top edge.

11. Sew the tape to the panel.

12. Fold the tape over to the opposite (right) side. If you are lucky when you fold the tape over it will hide the machine sewing lines from attaching the tape & from sewing the pleats together.

13. Hand sew, with a whip stitch or straight stitch, the folded part of the tape in place.

14. Repeat attaching the tape for the back panel.

15. Hem the skirt. Don't be shy about this. Idea length for a working woman's skirt is short enough that she doesn't have to pick the skirt up when going up stairs with her hands full of things. Also, if it's shorter you are less likely to step on the back when crouching down & standing up again, nearly falling head first into the fire pit you were bending down to tend!

To wear your petticoat:

1. Turn the petticoat right side in (d'oh!)

2. Take the ties from the back and wrap it around your waist like a backwards apron. Tie in the front.

3. Do the same with the front ties, going around back like a traditional apron.

Taadahh! You're wearing a period correct petticoat.

Hope that helped!

Labels: , , , ,

Wednesday, June 20, 2007

so again, I've fallen behind in updating how projects are going. I'm nominally working on the "great camp project" right now, which basically means that I'm putting together all the things needed for a good looking period correct camp site. Well, for as much as it's correct for a female street seller to be camping at all. Sometimes we just have to over look the big problems.

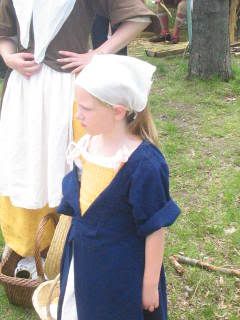
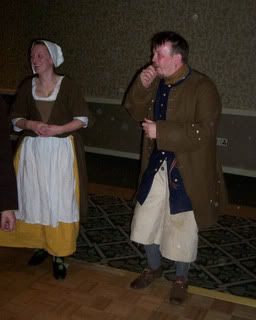
In the mean time, here are some photos taken of us at the Port Washington Pirate Festival. R! gave J the infamous, "it fits like it was made for you" black coat. It's not perfect correct, being out of cotton canvas, but it will keep him dressed until I can get around to making him one out of wool.


In exchange, I made R!'s eldest daughter, who is only 8 months younger than L, an outfit that matches L's. It worked out perfectly since they are so close in size, I just duplicated everything I did on L's. The one difference was that I stitched on lacing rings rather than doing eyelet holes. Well that turned out to be a mistake. M is a magician, she somehow managed to pull just so on the rings to pop them off within minutes of getting dressed. So Sunday morning, while everyone else was futzing around camp, I sewed 20 eyelet holes on M's jumps. Phew! I can't tell you how cute L & M looked running around like little twins with their long laces "long and strong". L even started hawking, although she needs to be louder in the crowd.

Labels: , , ,

Monday, May 28, 2007

A little side project

Just something I whipped up last week while waiting for patterns to arrive.

Photo Sharing and Video Hosting at Photobucket

Photo Sharing and Video Hosting at Photobucket

This is actually a reprint of select directions from "Games & Gamesters" By Charles Cotton, (printed in 1674). I picked out the directions that were similar to modern games and that actually made sense. There are several card & dice games. I choose to skip instructions on bowels and tables variations.

The cover is just art paper from the new Martha Stewart crafts line at Michael's. It's nice stuff. Stitched with linen thread. I owe the layout to J. I did several versions with a different binding, but this one, where the pages fold around each other is the period correct version (as far as I can tell).

I am already putting together several more period "booklets", in part for the broadseller impression and in part because they are fun and an easy add to the little details of a kit.

and no, I'm not sharing the secret to how I got the text to include the medial S ;) I deserve to keep some things a secret don't I?

Labels: , ,

By the Seat of My Pants

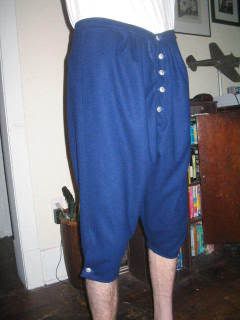
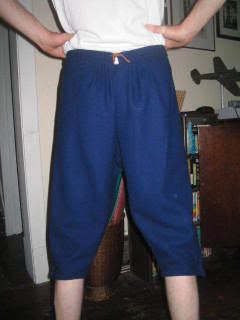
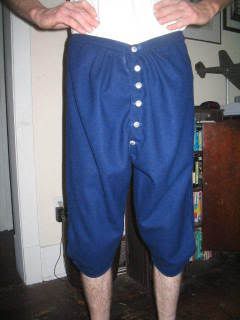
OK, not "my" pants, J's pants. And technically they're early period breeches.

Photo Sharing and Video Hosting at Photobucket

Photo Sharing and Video Hosting at Photobucket

Photo Sharing and Video Hosting at Photobucket

Made from the Reconstructing History pattern. 100% wool, left over from L's mantua. The buttons are cheap silver colored ones I picked up at the fabric store. I still haven't found the right metal buttons that also don't cost an arm and a leg. I ended up finishing the fly opening without the flap, same on the legs. I also did the early style binding on the leg hems in place of a traditional hem. They look pretty good, although J could gain about 20 lbs and they would probably fit better. Still I wasn't willing to make a 32!

Labels: ,

Monday, May 07, 2007

The shirt off my back

almost literally.

I finished a linen shirt for the common man's kit this weekend. There were only a few things I did differently from the instructions. You weren't seriously expecting me to follow them to the letter were you?

I left off the interior neck triangle. I didn't really see the point in it and since the shirt won't be worn frequently, I could chance it.

I pleated rather than gathered at both the collar and the cuffs. I am just not a gathers person. I want things to be even and lay nicely. Gathers just don't do that the same way pleats do. With some experiment I ended up leaving the neck gusset triangle unpleated. The shirt ends up nice and smooth right at the shoulders, with plenty of room across the back & chest.

I added 2" to the sleeves. I am so thankful that I measured & checked against J. He has long arms and the extra 2" made the sleeves fit perfectly. I would have been rather pissed to go through all that work only to find the sleeves just that much too short.

I am still deciding where, or if, to put a small cloth stuffed button at the collar. I put one on either cuff. I'm wondering, should the button go on the collar itself, or just below it? Should I just leave it off since J will probably leave the shirt open at the next anyway?

Either way, I'm very happy with the shirt. It only took a night to construct, even hand sewing the cuffs & collar, neck opening & bottom hem and shirt tails. It's very nice. In fact, I can see "borrowing" it to wear myself.

Labels: , ,

Tuesday, May 01, 2007

The Common Man Plan

This is the first time that J has asked, asked me to make him clothes. For the past 11 years it's been, yeah ok I'll wear what you tell me. No enthusiasm. But he's finally asked & I'm super excited. Lets see how I feel after having to sew all the button holes on his coat.

The Plan

Breeches: left over blue wool from L's mantua. It was going to be my wool petticoat but I'd rather she & I not have all the same colors in our clothes since we will be at the most events together. Patter for the breeches is Reconstructing History's 706 breeches and slops. I'm looking forward to that too becuase J & I still wear the same pants size. So making him a pair, means I'll have a pair if I ever need to dress as a man.

Shirt: The last of the Joann's heavy linen with guidance from various sources. I ws going to use the lighter linen that I got for my extra shift, but then remembered how tough on clothes J is. Plus, I don't want to give up my extra shift for him to have a shirt and I've got that JoAnn's linen that I don't really like for myself, so why not for J.

Coat: We're looking for either inexpensive coat weight wool, or a big old army blanket. I'm going to have my mom look at her Hancock's for the wool that they used to carry during the winter. So far I haven't had luck finding an old wool blanket, although that might not turn out to be cheaper than yardage either, depending. Pattern of course is Reconstructing History's 705, sailors & common man's coat. I gave j the option of having a justacourps but he likes the shorter, simpler style. No complaints from me, I like the less button holes option!

Workman's Cap: J saw these and decided that he likes them. So while at The Gathering this weekend he looked at a few and they were all too small for his head. Rats! So instead I'll be digging through my scrap linen and making him one. I was hoping he'd find something at the event so that there would be some variety in the materials used, rather than just the same scrap that both L & I are also wearing. Oh well. at least he'll have a cap.

Stockings: He'll be wearing one of my two pairs. I'm considering giving him the Lindsey-woolsey pair and having Leslie Carroll knit me a couple of pairs like L's. I need a wool pair and maybe a linen pair. The wool got very hot in 80* weather, so many linen stockings would be cooler if not perfectly PC.

Shoes: Here's where we get stuck. Shoes are expensive and J won't be wearing them all the time anyway. I'm thinking that we really need to try the cut down desert boots for him. They don't have to be pretty, he's a street seller for Pete's sake. So far that's the plan for shoes at least.

Labels: , , ,

The Complete Children's Kit


This was caught just before we left for the weekend, hence the reasons she's still wearing her cap. That lasted about 20 minutes before she yanked it off. Maybe she is right about it having the chin ties. We also had some trouble with the shoulder on her mantua. It's sewn to her in this photo. Normally it would be pinned, but L is scared of being poked. I am still brainstorming ideas for getting it to stay where it belongs without having to sew her into it every day. By Sunday, probibly because J was with us and she knew she could get away with more with him, she wasn't even wearing her mantua.

For shoes I ended up grabbing a pair of black loafers from ShopKo the morning before. They have the box stitching around the toe, but tied with ribbons & mostly hidden under her skirts no one was the wiser. Anyway, the were a slight bit better than the adults wearing black stockings & tennis shoes. I know that is the preferred method for adults that don't have period shoes, but come on. Some of these people were in really nice other clothes. If it's a money issue, why don't they try the cut down a pair method (which is on my list for J's kit this month)

Anyway, L looked great. We didn't managed to get any good photos. J took some but despite what he says, he doesn't get good pictures of me. Either that or I look like crap! I know I need to find the right brimmed hat for me. The one I had has way too much crown and makes my head look misshapen. I also need a new cap. I want a lappet cap with the sides folded up like I saw on someone's website.

Next up is J's garb, common man's clothes!

Labels: , ,

Thursday, April 26, 2007

The Finish Line Is *IN* sight!

Yesterday I managed to sew together the base for L's mantua. The more I sew with that Pendelton wool, the more I fall in love. The second time on the mantua was definatly the charm. Everything has come together beautifully. Well except for the fact that the body was too long, leaving the gores in the side about 5 inches too low. Drat!

So today I pulled out the side gores and pushed them up to L's proper hip level. Unfortunatly I used nearly all the blue linen thread from Wm. Booth Draper sewing everything together in the too long incarnation, so everything else is sewn with dark blue poly thread. Sad, but true.

Anyway, once the gores were in the right place I mimiced the pleating in the underarm area like Kass has on her mantau pattern. In her version you cut an inverted "L" shape to create the underarm and side seam. When you reach the gore you stop, letting the remaining fabric fall to the inside & create a box pleat. On this smaller version I tapered in from the underarm to narrow the side seam and stopped at the gores, but didn't cut. It works nearly the same way and looks rather good (if you've got your nose in my 6 year olds armpit!)

Tonight I bribed L with "Night at the Museum" and cotton candy, so that she would stand still long enough for me to put the pleats in the back & the two pleats in either side of the front (the ones that were "lost" on my mantua). Everything is now pressed nicely with my new fancy-schmancy steam iron and basted in place.

Tomorrow I will blind stitch the pleats with the remaining blue linen thread & cut off the extra length on the front/back panels. Although I'm seriously considering leaving the back long. It's acting as a short train right now. How wise that is for a kid though. Come to think of it, cutting it ever all the way around sounds like a good idea. I am also going to install a hook and thread eye in the front center so that L doesn't have to wear a pin. She is genuinely afraid of getting poked with a pin so the hook is a better choice not just for general functionality (what kid doesn't move around tons?) but also for her own comfort level. If there is ONE thing that everyone making historically based clothes for kids should consider it's the comfort level. These are modern children and while we adults will suffer for our "art",the kids just want to have fun. Uncomfortable clothes & boring events aren't going to encourage them to continue reenacting when they become adults!

Labels: , ,

Tuesday, April 17, 2007

Mini Me

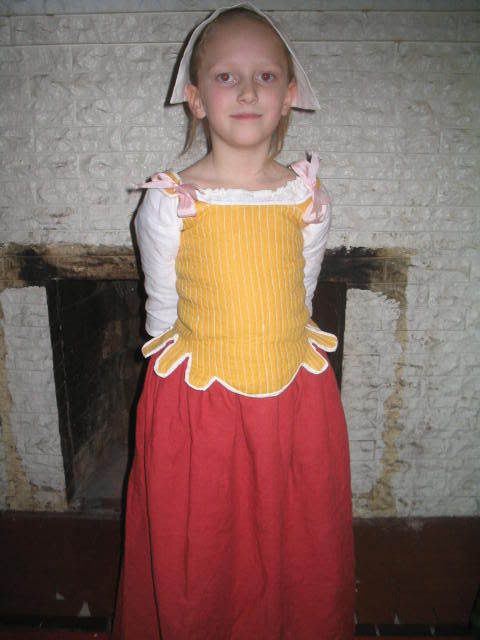
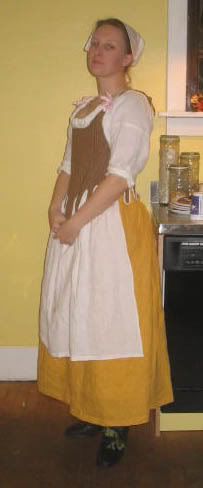
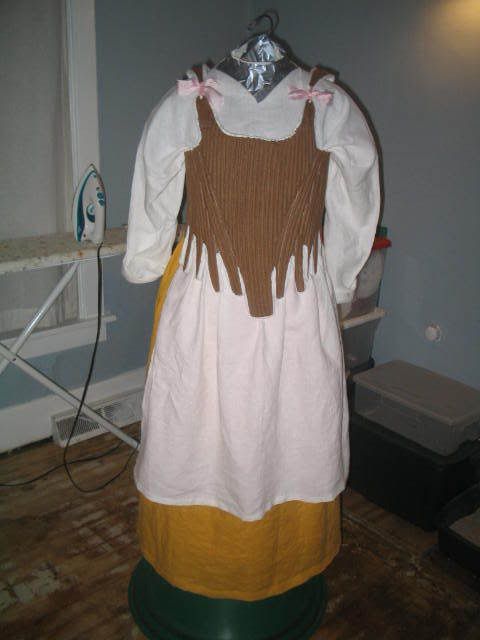
Here she is, everything but the mantua!

Photo Sharing and Video Hosting at Photobucket

- Linen shift with linen tape neck & sleeve hems & cotton tape drawstring to make it wearable longer

- White linen petticoat with linen tape waistbands

- White linen pocket with linen waistband

- red linen petticoat with linen tape waistbands

Photo Sharing and Video Hosting at Photobucket

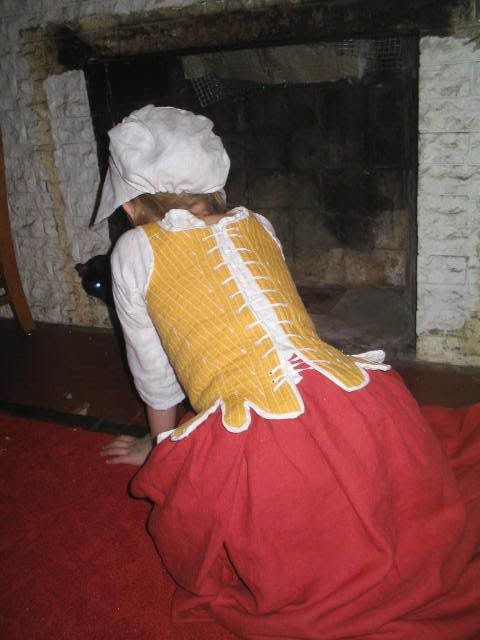
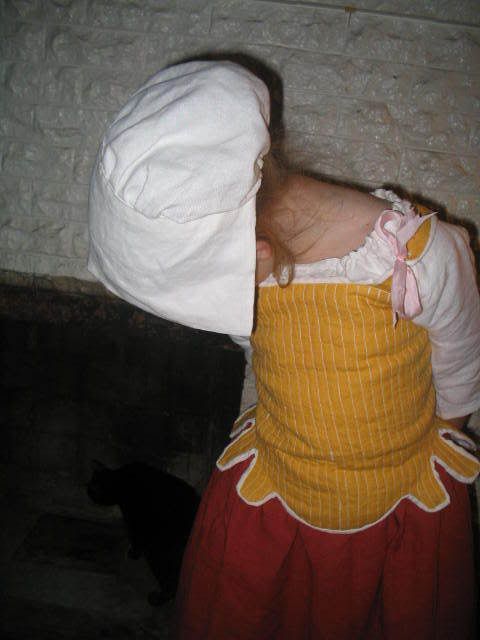
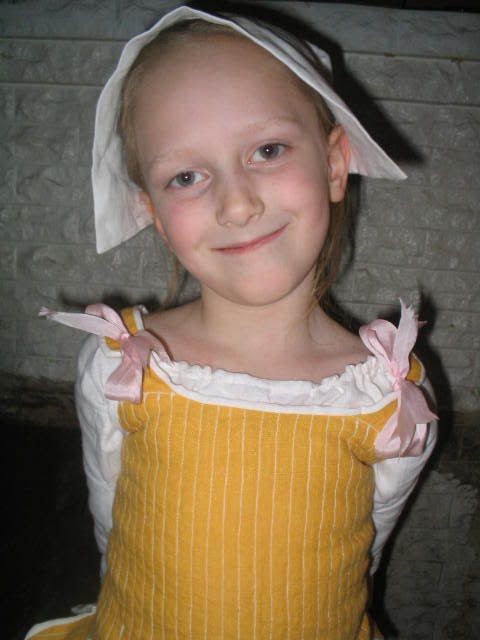
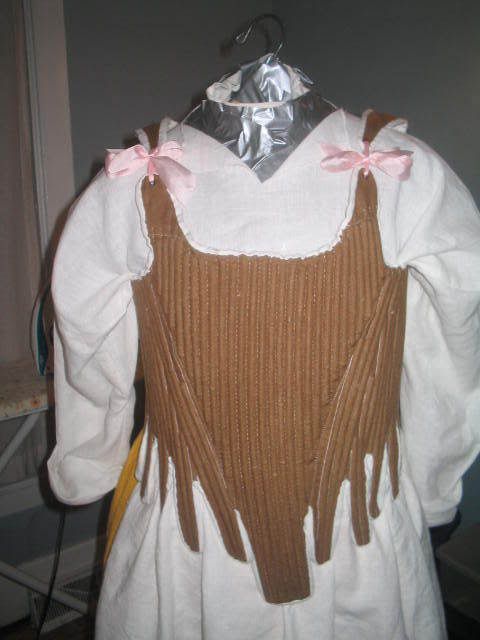
- yellow linen "jumps" with heavy linen interlining & light linen lining trimmed in dutch linen tape. Back (yes I know it's laced wrong, it was 2AM!) has eyelets bound with linen, tied with thin cotton tape. Each side of the eyelets has 3 strands of hemp cording (left over from my hemp corded bodice) for stability. Otherwise they are unboned to give her the flexibility that a modern child is used to. And of course don't forget the shoulders, tied with the pink silk ribbons off my stays. I'll just have to use the blue silk on mine instead, after all, L just loves the girly pink ribbons.

Photo Sharing and Video Hosting at Photobucket

- White linen cap hand sewn with silk. I'm going to make another one since this is actually the first one I made that was too small for me. It fits L but we're having a problem getting her long, thick, heavy hair up enough to stay in the cap. I have also added a purple silk ribbon to one of the straw hats I had around that didn't fit me because of my hair. It fits L perfectly & is painfully cute!

In other "Mini Me" costume news; I lucked out and found her machine knitted, hand dyed stockings. I was doing a search on E-bay and ran across a woman who had made a pair as a test which unfortunately came out too small in the ankle for her to wear. Well they fit L's measurements perfectly so I snatched them up. I'm stalking the mailman for when they arrive.

The last details are the mantua (currently in progress) and finding her suitable shoes. I had an idea about cutting down these loafers I found at Walmart, but unfortunately they don't go up to L's size. I also found a place that makes later 18th C. children's shoes, real leather & meant for real buckles. I just don't want to take the $85 plunge for shoes for her just yet if I can find something else that will work.

Photo Sharing and Video Hosting at Photobucket

She wore this for 3 days straight. Didn't even take off the shift or under petticoat to sleep. I'd say she's ready for a period encampment!

Labels: , , ,

Friday, February 16, 2007

Everybody Jump, jump, jump around!

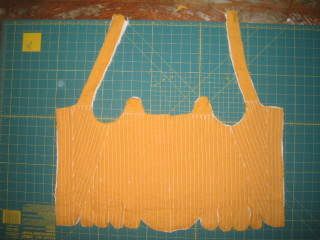
Half way finished with L's jumps already. The difference between hand sewing & machine & something half the size is noticeable.

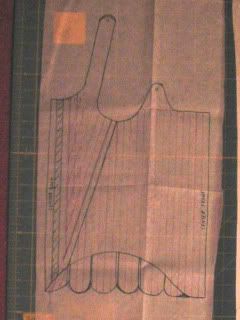
Drafted the pattern last night with the Custom Corset Pattern Generator, Tabbed Corset Instructions & Bodice Drafting Instructions. I've used this set of instructions before for my Hemp Corded Bodice.

Photobucket - Video and Image Hosting
a poor photo of the pattern with boning lines marked out.

I think it took longer to get L to hold still for the measurements than it did to draft the entire pattern. I cut the front with a gentle curve about 11" long and added the tabs in one rather than sewing them after the fact. I also adjusted the back so that it wasn't too high. I shifted the straps so they will tie with ribbons on the front, which should add some length adjustment should L grow suddenly. I cut a muslin & got L to hold still long enough for me to test fit before cutting the layers of linen.

Photobucket - Video and Image Hosting

The jumps are made exactly like boned stays, without the boning. 2 inner layers of 6oz linen, an outer layer of mustard yellow 5oz linen (left over from my petticoat) and an inner layer of fine 5oz linen. These will have dutch linen tape when it arrives. All channels are sewn to fit 1/4" reed boning and/or 2-3 cords of thin hemp cording. However, I am only putting cording on either side of the lacing holes in the back currently. In the future I can pull the binding off and add more, but for now I'm just happy to have L wanting to wear them!

Labels: , , ,

Monday, February 12, 2007

Rare Photo's From RF2

Seems I was too much of a wallflower at RF2 to have ended up in many photos. I'm a little disappointed in that but then again, it's not outside my personality to disappear like that in a crowd.

Without further a due, the few photo's that there are of me.

One where Mr. Foxe looks terrible
Photobucket - Video and Image Hosting

One with some odd black spot on my eye & Kass
Photobucket - Video and Image Hosting

One where I look like an ad for Reconstructing History (that's their banner & phone number above my head)
Photobucket - Video and Image Hosting

Yep that's it. Three days, countless hours, Helped out in the Reconstructing History Booth, was at all the after hours social events & there are all of three photographs of me. I really need to work on that if I want to have any proof that I'm at these events when I'm an old lady.

Labels: , ,

Thursday, February 01, 2007

Pocket Full of Happiness Part 2

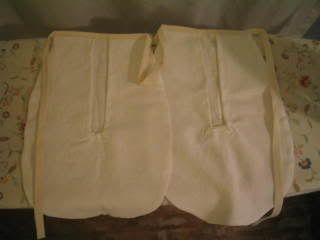
I simply had to replace the muslin pocket I made way back in the beginning of all this. So here they are. Linen pockets with dutch linen trim on the openings. Machine sewn with silk since the linen was making it act all wonkey. Unfortunately I ran out of the tape before getting to the waistband. So I used a scrap of poly bias tape from the bin. Just can't get away from having some bias tape on these pockets. I'll rip it off & replace it when I get more of the dutch linen. I go through that stuff more than anything. This was 10 yards & I could use 3 more easily. Next time I'll buy the entire roll.

Photobucket - Video and Image Hosting

Labels: , , ,

The Finished Product

Photobucket - Video and Image Hosting Photobucket - Video and Image Hosting

Photobucket - Video and Image Hosting

There will be more "in action" pictures from RF2 this weekend. Hopefully some really good ones. For once I'd really love to have some really good pictures of my work.

Labels: ,

Tuesday, January 30, 2007

Bottle Up Your Enthusiasm

Just a few touches to my "things".

From the wonderful Mary at Westmoore Pottery

Photobucket - Video and Image Hosting Photobucket - Video and Image Hosting

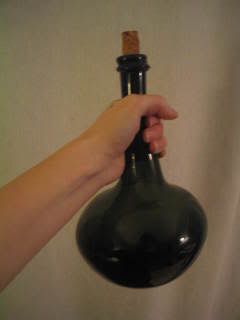
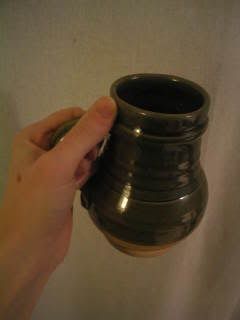
I already have to replace the cork, since my reshaped wine cork broke. These are the most lovely pieces I have ever seen. Hand blown glass "shaft & globe" bottle made in vA by John Pierce and Dave Byerly. The green mug is even prettier in better light. Plus it holds an entire pint! Nothing like a big drink to make a pirate happy.

Labels: ,

Monday, January 29, 2007

Hemming & Hawing

The mantua is finished.

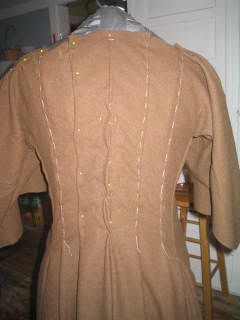
Here's mid pleating. Some are pinned, some are basted. I ended up having to tie the silk thread oddly to keep it from pulling out under the weight of the wool. I couldn't tie knots big enough not to pull free (pun unintentional).
Photobucket - Video and Image Hosting

I realized yesterday why the front didn't seem right. Someplace along the line I lost the front pleat. Well, there's a classic Chole project for you. I ended up cutting back the front to create the V shape I wanted. Waugh's has a slanted front so it's not totally out of the question for it to be shaped that way.

I also faced the entire front rather than just the top portion. I like the way it finishes better, especailly since I'm not sure how the fulled wool gab. would unravel & I want the hems & seams as finished as possible.

All in all, not perfect, but not bad. All that's left is the bottom hem & the tie backs. Originally I was going to leave it hanging, but it just doesn't look right that way. So I've got to sit down and whip off a couple of cloth covered buttons & the tie backs. I thought about taking T's idea & making a few thread wrapped buttons but I don't have any wool floss & the linen & silk I can find aren't the right color. So it's cloth wrapped, which is faster anyway.

Wed I'll do a "test run" & wear the whole kit all day to see where there might be any problems. I'm not anticipating anything with the base, stays/shift/petticoats since I've worn them twice now without problems. I already learned that the brass pins I have didn't cut it for holding the heavy wool pins together, so I'll be using old tailors pins instead. The brass will be perfect for the silk mantua though.

Which brings me to the next bit, I've already started on another mantua. This one is Duponi silk in a rusty orange color. It's cut & partially constructed already. I started having a panic attack on Friday about not having done enough the last two months & not having something "pretty" to wear to the ball. Well the silk mantua won't be finished by RF2. It could be, but since I don't have a fancy petticoat that I like to go with it and I have no ideas/solutions for hiding my hair except under a non-fancy cap, I set the whole project aside until later.

So anyway, I'm off to put those finishing touches on the brown wool mantua & throw together some linen pockets. Even though noone will be able to see them, I just don't feel right having any cotton/poly material on me with all the other work I've put into the kit.

and that would be the point in which I surpass "Slightly Obsessed".

Labels: ,

Sunday, January 21, 2007

Come Together

Progress is being made on the mantua, despite quite a few mistakes & completely not understanding the turning gore. Tomorrow S will help me get the back pleats just right. I have been trying it on Sticky but I keep going around in circles. I really need another set of eyes saying "yes, that's right. No that's not".

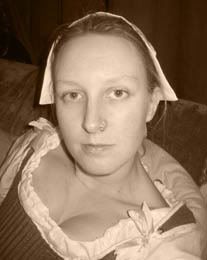
That didn't stop me from putting on everything I have finished on today & wearing it around the house. I need to put some hours into wearing the stays to get the tabs shaped to me better. I wanted to see how the neckline of the shift worked out & where to cut off the sleeves. I have since decided that I'm just going to fold the sleeves back & tack into place. Maybe. I don't really want to cut them off & hem but that's way at the bottom of the "to do" list anyway. I also need to either hem up a linen neckerchief or dig out one of the silks. The exposed neck area is nice, but way to "ren faire wench". The cap also needs to be redone. This is the too small version.

Photobucket - Video and Image Hosting

Naturally, pardon the terrible self portrait. No one is willing to help take photos around here. It's enough to make a girl think she's not photogenic.

So now, since I'm rambling. I've been thinking about how lazy I've been these last 2 months. I could have gotten so much more done & I haven't. I wish I had another outfit, something fancy to wear to the ball. If I had worked harder and spent more time working on this stuff then I could have gotten something nice made as well. There is that part of me that says, hey, just whip out another skirt & another mantua. Once you get one finished how hard will be making another? Yes, it's true, I'm already feeling like a failure and like all this work is just junk. I hate this point in a project.

Photobucket - Video and Image Hosting

Labels: , ,

Monday, January 15, 2007

Stay Tuned

Finished! It only took about 5 hours (& the end of Captain Blood) to sew all the eyelets. Not much else to say about this right now really.

Photobucket - Video and Image Hosting

They aren't laced on Sticky. They need to stretch a bit & the tabs haven't started bending outward yet. Poor Sticky is just too much of a pushover. Her hips were bending in when I tried to lace her up. So instead, I'm sitting around wearing them in.

Photobucket - Video and Image Hosting

L's touch was suggesting I use the pink silk ribbon out of my collection on the shoulders. I've also added a nice fat green ribbon to my shoes. I love that ribbon.

Labels: ,

Sunday, January 14, 2007

Shifty Business

Almost completed my shift tonight.

Photobucket - Video and Image Hosting

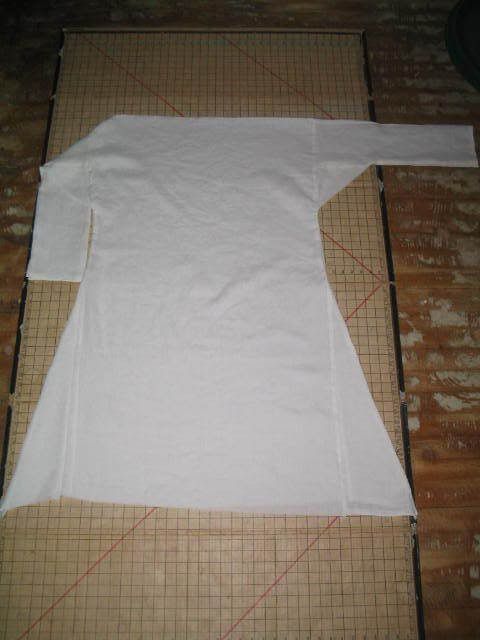
Yes, it would be perfect for the headless horseman at this point. I left the head hole out until I've finished the stays & can cut the neckline with the stays on. This way I'll be sure that the shift isn't too big in the neck or too small either. Like every other shift I've made, the sleeves are too long. Oh well, a little chop-chop and they will be perfect. That too will wait until it's being worn. Last I'll do the hem, but that's another quick machine project. I can blind hem on a machine in my sleep!

3oz hanky linen from Fabric-store.com (where else?), machine sewn so far (will finish neck & sleeves by hand) with silk thread. The linen I'm saving for my cap & other 5oz projects since it's the heavier weight thread. Linen & silk is a fabric-gasm if I ever had one. Especially with this light weight linen. I was originally going to use 5oz but changed my mind. I figure, if you're using essentially the same material for the entire outfit, might as well change the weights & weaves up a bit. I've very happy I went with the lighter. It feels exactly like I wanted.

Photobucket - Video and Image Hosting

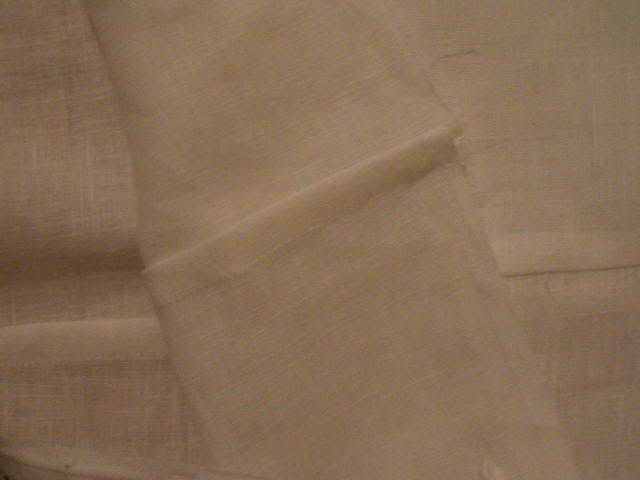
Look ma, French seams. A word to the wise, French seams and gussets do not play nicely together. Also, I remembered why you're supposed to trim the first seam before flipping & "frenching". When you don't, you might not have problems catching the first seam inside, but you could very well end up with hairy seams. Ooopsy. Thankfully most of the loose thread can out with a quick pull. Now maybe it was me but I found the hairy seam in the underarm gusset to be very funny at 1:30 this morning!

Labels: , ,